%201.svg)


How to Clean Paint Brushes the Right Way: A Pro's Guide
Key Takeaway:
Cleaning paint brushes properly preserves their quality, extends their useful life, and protects the environment. Knowing how to clean paint brushes based on paint type—using the right tools, soaps, and disposal methods—saves money and helps you achieve professional results every time.
Every homeowner, DIY painter, and pro knows the frustration of picking up a paint brush only to find it rock hard, bristles splayed, and useless for clean lines. At Cover Pro Painting, protecting our tools is fundamental—we don’t just toss brushes after one job. The difference between a crisp, professional finish and a botched, streaky mess often lies in how you clean and care for your brushes. This comprehensive guide breaks down how to clean paint brushes the right way—for every paint type and scenario—so you’ll get more value, better results, and less waste every time you paint.
Why Proper Paint Brush Cleaning Matters
Brush Longevity & Quality Application
Good brushes are a painter’s best asset. The right natural bristle brushes or synthetic brushes—when cleaned and maintained—stay flexible, hold their tip, and ensure even paint coverage. Neglect them, and brush bristles splay or harden, leading to streaks and wasted paint. Whether you’re working with oil based, latex paint, or acrylic paint brushes, cleanliness determines a tool’s shelf life and the look of your finished project.
Cost Savings: Cleaning vs. Replacing Brushes
High-quality paint brushes aren’t cheap. One professional-grade brush can cost as much as a gallon of premium paint. With proper cleaning and care, that investment can serve you for years—sometimes decades. Replacing brushes after a single use isn’t just wasteful, it’s expensive. Mastering how to clean dried paint brushes and daily cleaning routines puts money back in your pocket.
Environmental Impact of Proper vs. Improper Cleaning
Dumping paint-laden water or solvents down the drain hurts our waterways and triggers regional penalties. Responsible brush cleaning protects both your wallet and the environment. It’s about more than just removing excess paint; safe practices keep contaminants out of our local ecosystem.
Quick Tips: Clean brushes immediately after use. Paint that sits even for a few hours can begin to harden—especially acrylics which dry fast. Don’t wait—pre-rinse and address all the paint in the brush head right away for best results.
Know Your Paint: Water-Based vs. Oil-Based (and Beyond)
Why Cleaning Steps Depend on Paint Type
The first rule in how to clean paint brushes: know your paint. Cleaning a brush loaded with oil based paint is not the same as rinsing out latex or acrylic paint. The paint’s chemistry dictates what dissolves it—water for latex/acrylic, or mineral spirits/paint thinner for oil based and solvent based paint. Misidentify your paint and you risk damaging brushes or contaminating local drains.
Identifying Your Paint for the Right Cleaning Approach
- Latex/Acrylic Paint: Water-based, cleans with warm soapy water (dish soap or laundry detergent, plus hot water for stubborn residue).
- Oil Based Paint: Requires mineral spirits, paint thinner, or brush cleaning solutions.
- Specialty Coatings (Polyurethane, Gel Stains): May need denatured alcohol, lacquer thinner, or specialty brush cleaners.
When in doubt, check your paint can’s clean-up instructions or reference material like our complete painting process guide for more details.
Quick Tips: Oil paints and solvent based stains stick deep in brush bristles. Always use a clean container (such as a small bucket or airtight container) for solvent cleaning. Never pour remnants down household or storm drains.
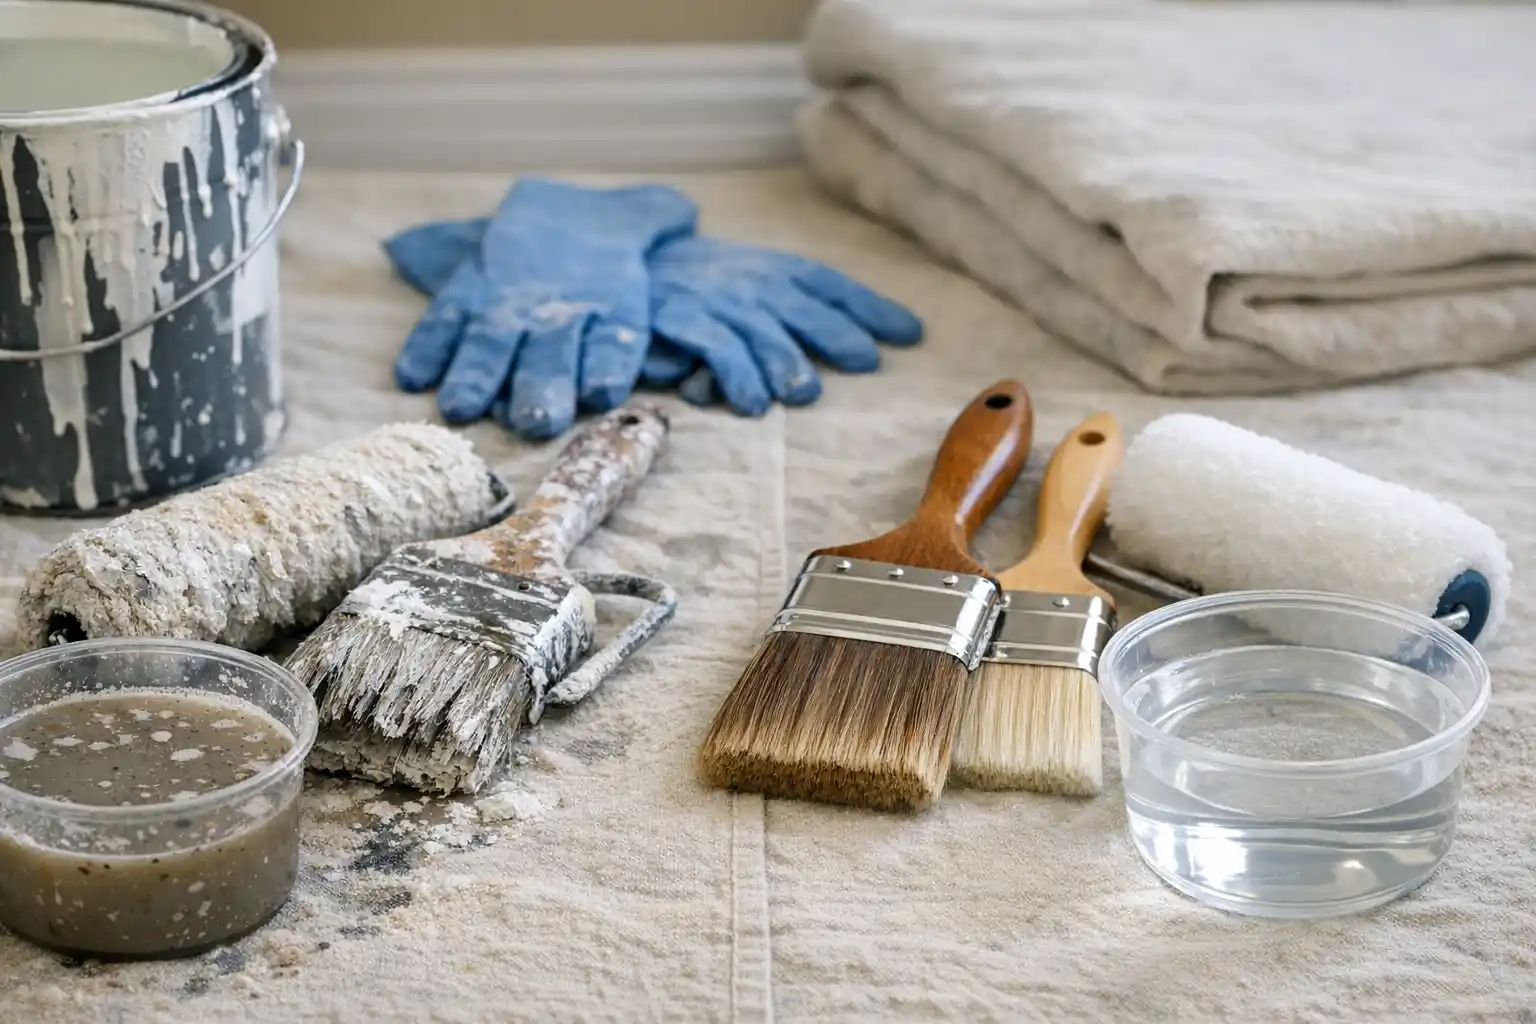
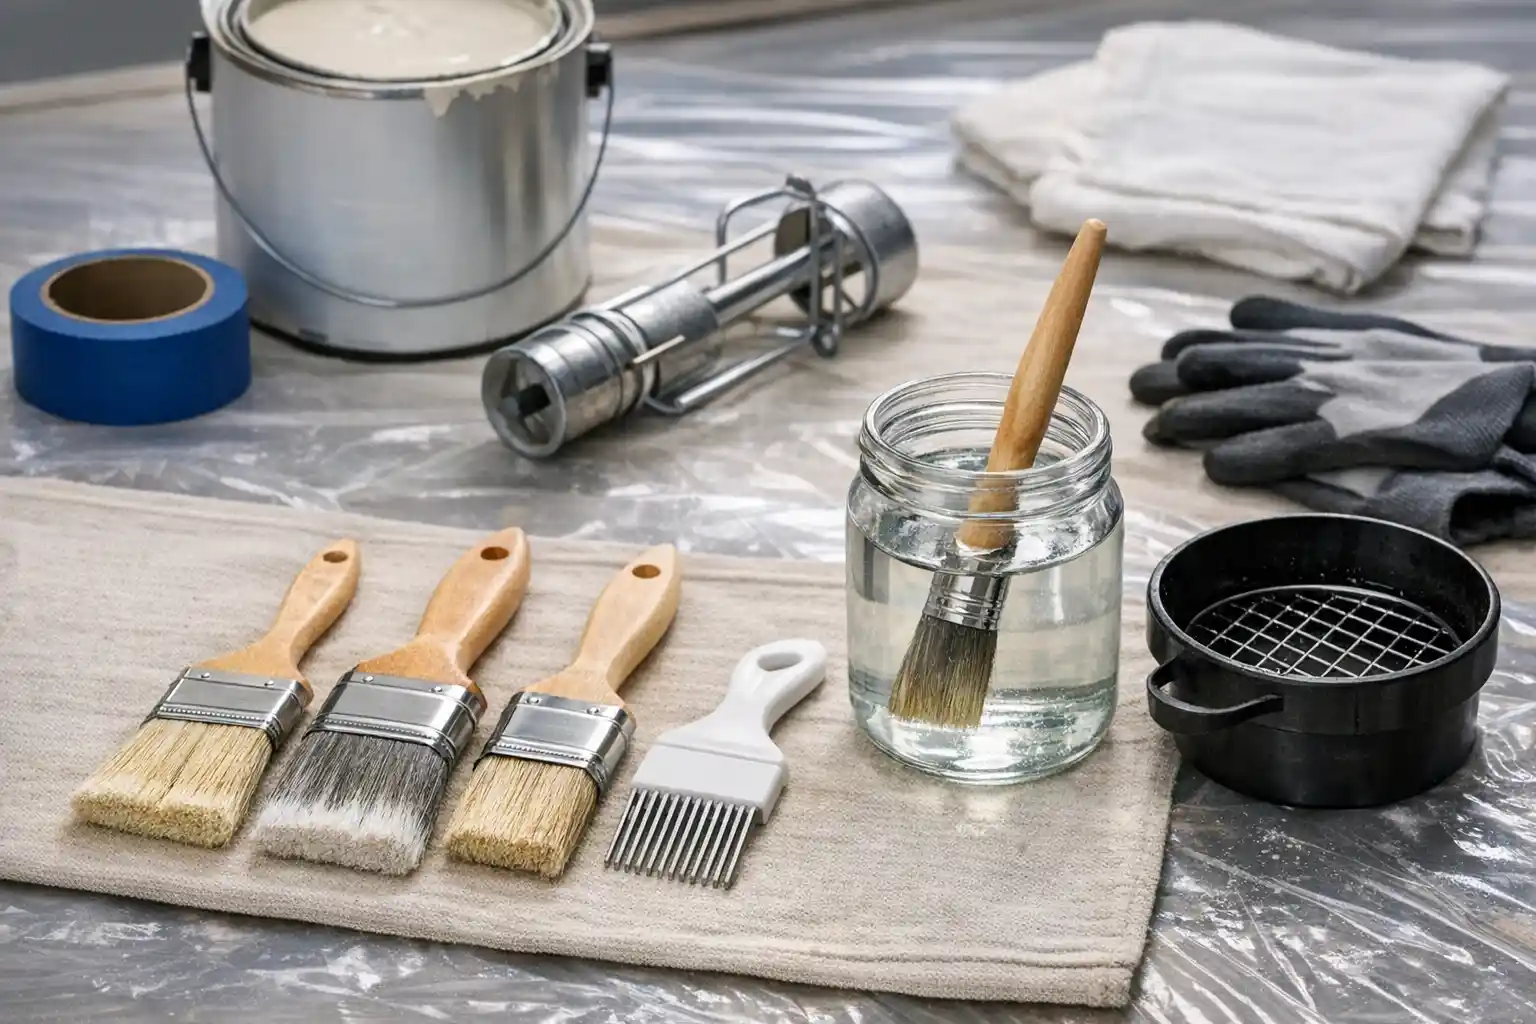
Gathering the Right Tools and Products
Brush Combs, Cleaning Solutions, and Soaps
- Brush Comb: Essential for dislodging trapped, dried paint and separating bristles after washing.
- Wire Brush: Used carefully, this helps on the ferrule (metal) but not directly on fine bristles.
- Dawn Dish Soap/Dishwashing Liquid: Mild but effective for latex and acrylic paint residues.
- Murphy's Oil Soap: Gentle for natural bristle brushes and helps condition them after oil based paint removal.
- Mineral Spirits & Paint Thinner: Used for tough oils and varnishes. Use gloves and work in a ventilated area.
- Lacquer Thinner/Denatured Alcohol: For specialty coatings and dried paint revivals.
- Warm Water/Hot Water: The base for all initial cleaning—avoid boiling temperatures which can deform brush adhesive.
- Paper Towels & Clean Containers: For blotting brushes and segregating cleaning mixes.
DIY vs. Professional-Grade Cleaning Products
Big box stores sell basic soaps and solvents, but professional cleaners and brush combs go further. We recommend investing in a brush comb, a spin cleaner (for pros), and specialized brush savers if you’re regularly handling solvent based paint or dried paint brushes.
Storing Your Cleaning Kit: A Pro’s Recommendations
Keep cleaning tools in an airtight container with labeled small buckets for clean/dirty water or solvents. Stash gloves, a wire brush, and spare paper towels together—you’ll clean thoroughly and safely without scrambling between paint and cleanup duties.
Quick Tips: Avoid using regular household soap for oil based paint—the residue can gum up bristles. Instead, rely on designated brush cleaner or mineral spirits. Rinse synthetic brushes in warm soapy water, not scalding hot, to protect glue seams.
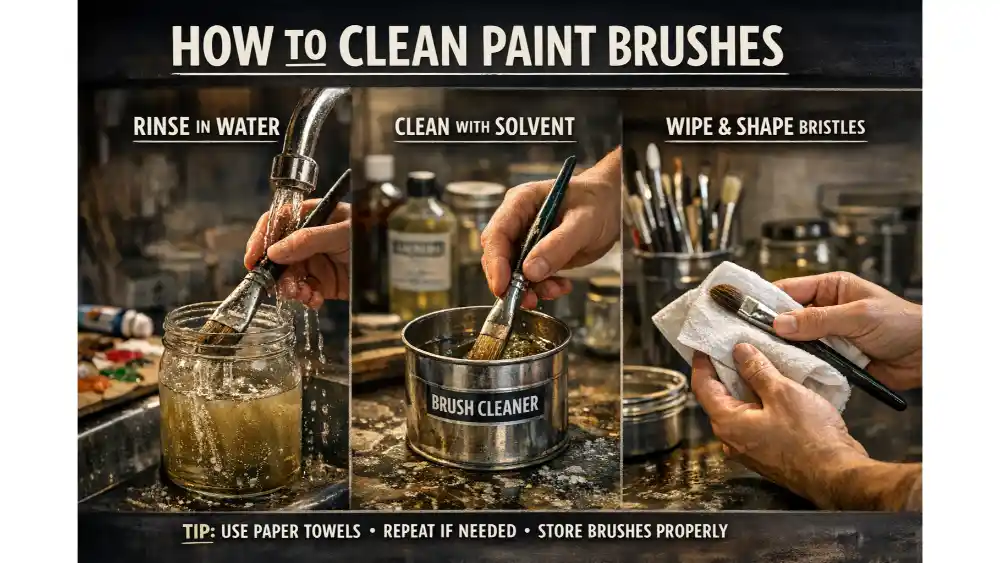
Step-by-Step: How to Clean Water-Based Paint Brushes
Initial Steps: Scraping & Pre-Rinsing
- Wipe excess paint from brush with a paper towel or newspaper after painting.
- Rinse the brush head under warm water, fanning out bristles to release trapped acrylic or latex paint.
Washing, Combing, and Final Rinse
- Mix a small bucket of warm soapy water (using dishwashing liquid/Dawn dish soap or laundry detergent).
- Swirl the brush in the solution until paint flecks stop leaching. Work soap through with your fingers or a brush comb.
- Rinse with warm water; repeat until all the paint is gone.
- For stubborn residue, a brief soak in warm vinegar helps loosen dried paint without damaging bristles.
Drying and Storage: Preventing Damage
- Shake out excess water; never wring or twist bristles.
- Reshape brush head using your fingers, then hang to dry or lay flat to dry completely.
- Once bone dry, store brushes in an airtight container or brush holder to prevent dust and splaying.
Quick Tips: Frequently clean brushes during long painting sessions. Even water-based acrylics dry fast; keep a clean container of water nearby to suspend and wash between coats. This avoids dried paint brushes before your project’s even done!
Step-by-Step: How to Clean Oil-Based Paint Brushes
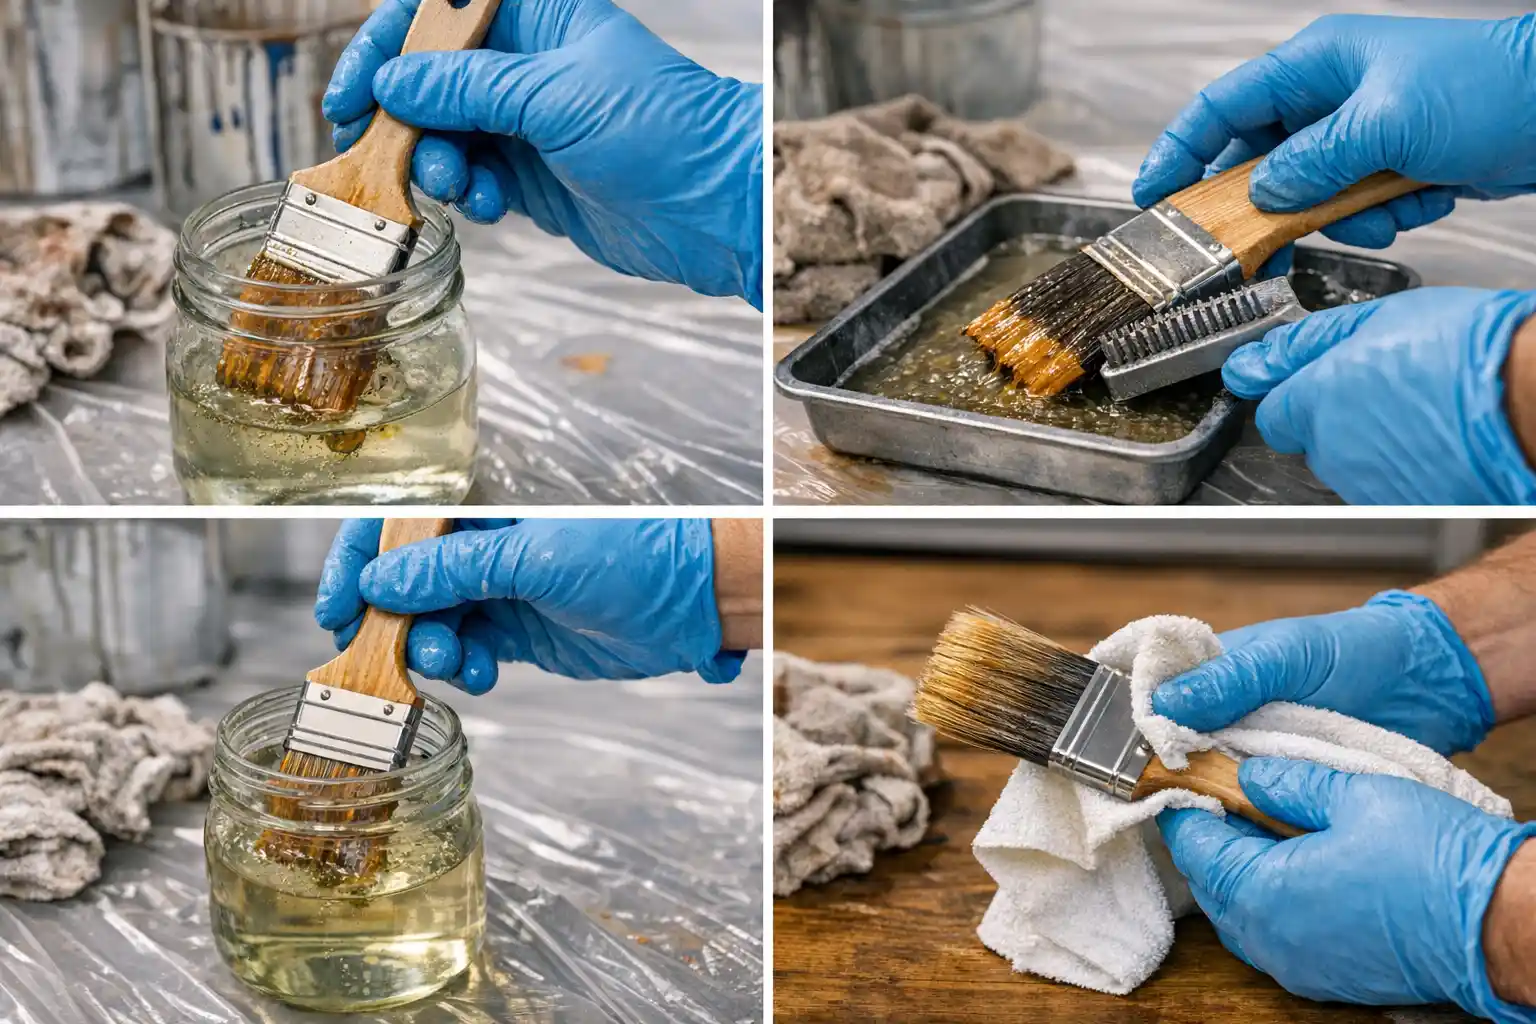
Choosing the Right Solvent (and Safer Alternatives)
For oil paints, stains, and some specialty coatings, use mineral spirits or paint thinner. Never use water first—oil repels water and only makes the cleanup harder. If you’re concerned about fumes, there are low-odor and eco-friendly brush cleaners available.
Detailed Cleaning Process
- Pour a small amount of mineral spirits or paint thinner into a clean container (never re-use primer or finish cans for this!).
- Swirl brush until the oil based paint loosens from the bristles, working it through with a brush comb.
- Repeat with a fresh solvent batch if the first rinse is heavily colored.
- Wipe the brush with a paper towel to mop up as much solvent as possible.
- Wash with warm soapy water (dish soap or Murphy's Oil Soap) to remove remaining residues and protect bristles.
- Rinse thoroughly and dry completely before storing.
Special Steps for Stains and Varnishes
For brush restoration or rock hard dried paint, use lacquer thinner or denatured alcohol as a last resort—always in a ventilated space, and always rinse with soapy water afterward to avoid residue buildup. Never soak natural bristle brushes for extended times; it can break down the glue and bristle structure.
Quick Tips: When working outdoors, never dump used solvents or paint water onto soil or drains. Pour into an airtight container, then take to approved waste facilities.
How to Clean Specialty Brushes (Stains, Polyurethane, and More)
Dealing with Gel Stains and High-Adhesion Products
Specialty coatings—gel stains, high-adhesion primers, or enamels—cling tightly to brush bristles. Check the label for recommended cleaners. Rubbing alcohol or denatured alcohol handles acrylic-based stains or shellac, while stronger solvents (like lacquer thinner) tackle tougher residues. For dried paint, brush restorer products can sometimes rescue otherwise lost brushes.
When to Use Brush-Saving Cleaners or Restorers
If you inadvertently let paint dry in the bristles, several pro-grade solutions are designed to clean dried paint brushes. Some formulas dissolve dried latex, acrylic, and even old oil paint, allowing you to salvage almost rock hard brushes—though it won’t replace prevention as your best practice.
Quick Tips: Always check if your brush is suitable for the paint type. Synthetic brushes withstand acrylic and latex paint, while natural bristle brushes shine with oil based paint—but will swell and fail in water-based paints. Choose and clean accordingly.
Brush Preservation: Pro Tips for Getting the Longest Life
Using Brush Combs and Spin Cleaners
After washing, use a brush comb to gently fan and separate bristles, pulling out stray dried paint or debris. For those who paint frequently, a spin cleaner helps remove excess water and keeps brushes uniformly shaped without hand fatigue.
Pro Tricks: Wrapping, Hanging, and Handling
- Reshape wet brush bristles and wrap in paper (or original packaging) to maintain brush head integrity.
- Hang brushes with the bristles down—don’t rest on their ends—to avoid bends and fraying.
- Store in a dust-free space or airtight container until your next project.
Avoiding Common Mistakes That Wreck Brushes
- Never let brushes sit in hot water or solvent more than a few minutes—this can dissolve glue holding the ferrule and lead to bristle loss.
- Don’t scrub aggressively with a wire brush on fine bristles; use only on sturdy parts or for removing stuck finish from ferrules.
- Always dry completely before sealing in a container to prevent mold or mildew.
Quick Tips: A good brush can last years with care. After use and cleaning, always double-check for hidden paint near the ferrule (metal band)—that’s where dried paint sneaks in and eventually splits bristles.
Eco-Friendly Cleaning: Best Practices for the South Puget Sound
Minimizing Water Waste and Chemical Use
Overuse of hot water and harsh detergents strains both the environment and your utility bill. Clean brushes in a small bucket, reuse the first rinse water for several brushes, and save final rinses for drinkable water only. For paint thinner, let solids settle and reuse the clean portion for future cleaning jobs.
Sustainable Cleaning Solutions and Their ROI
Eco-friendly brush cleaners—often plant-based and low in toxicity—can match the cleaning power of harsh chemicals for latex paint and some acrylics. They may cost more up front, but they extend brush life and reduce your environmental impact, providing real savings long term.
Alternatives if You Have Water Use Restrictions
If you’re under drought rules or want to minimize runoff, wipe most excess paint from brushes before washing. Batch clean several brushes together and use minimal solvent (then store spent solvents in an airtight container for hazardous waste disposal). Some recycling centers now accept solvent-based paint residues for safe processing.
Quick Tips: Never let solvent-based rinses evaporate outdoors. Contain and transport them to an approved disposal site as per local regulations. Many counties offer free hazardous waste drop-off.
Legal & Safe Disposal of Waste Water and Solvents in Washington
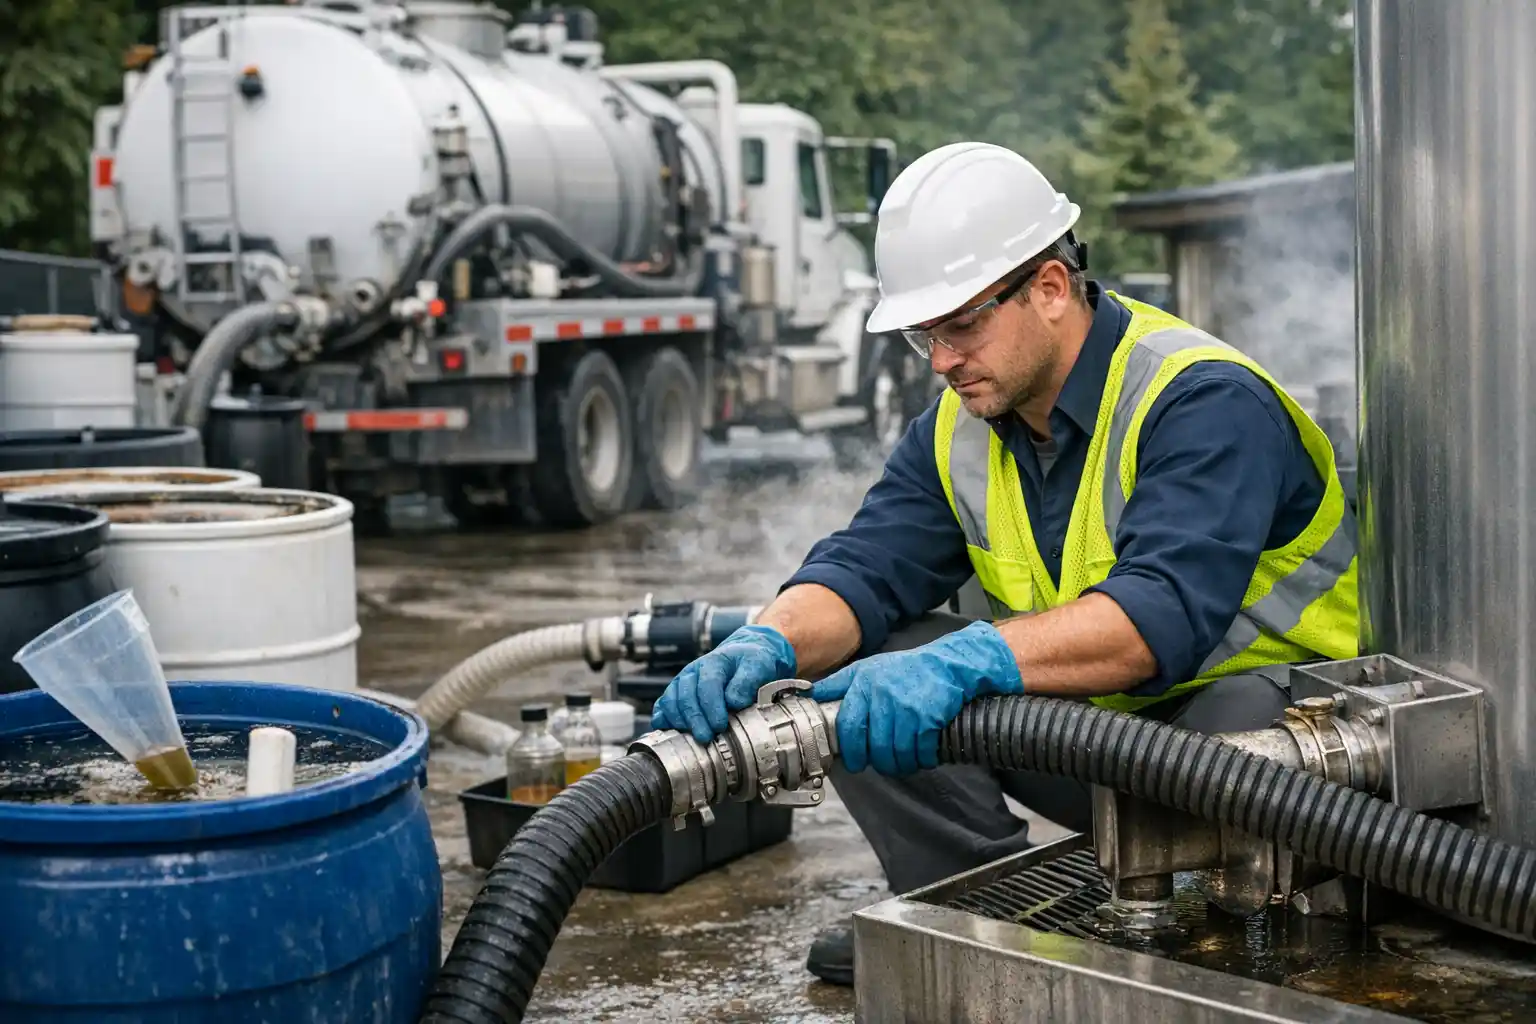
Why Storm Drains Are Not the Solution
Poured-down-the-drain water or solvents contaminate rivers, lakes, and groundwater—and authorities are quick to fine offenders. That quick fix can become a costly mistake, both environmentally and financially.
Current Regional Regulations and Penalties
In Washington and throughout the South Puget Sound, homeowners and businesses are required by law to remove paint and dispose of rinses and soiled solvents as hazardous waste. Fines can be steep for illegal dumping, and disposal guidelines change regularly—always check your county’s latest regulations.
Where to Take Paint-Contaminated Waste in the South Puget Sound
Municipal hazardous waste facilities (Tacoma, Olympia, and surrounding counties) accept paint-contaminated water, mineral spirits, or leftover paint for safe handling. Visit their websites or consult our resource guide at Cover Pro Painting’s contact page for up-to-date instructions.
Quick Tips: Never pour paint thinner, mineral spirits, or paint water onto the ground or into any municipal drain. Collect in a labeled airtight container and arrange for pickup or drop-off at your local county’s hazardous waste site.
Troubleshooting: Signs Your Brushes Need More Than Cleaning
When to Restore and When to Replace
If bristles are permanently splayed, the brush head is misshapen, or the brush is rock hard with dried paint, restoration products may not rescue it. A clean dried paint brush can be revived if you catch it early—try soaking briefly in denatured alcohol or a brush restorer. If a brush is shedding bristles or the ferrule is loose, it’s safer to replace.
Preventing ‘Single-Use’ Mentality and Reducing Environmental Impact
Throwing away a brush after one use isn’t just bad for your wallet—it’s bad for the environment. Routine cleaning and a little patience can restore many brushes, reducing landfill waste and pollution associated with manufacturing new brushes. Consider this a sustainability win-win for your next home painting project.
Quick Tips: Invest in a brush comb and cleaning solution before tossing out a stiff brush. Most dried paint brushes can be rescued unless paint has reached the ferrule and set completely.
Cover Pro Painting’s Commitment to Quality and Sustainability

How We Clean and Maintain Our Brushes
Our crews at Cover Pro Painting treat brushes like their most valuable tool. We use warm soapy water for latex and acrylics, mineral spirits for oil-based paint, and always finish with a brush comb and air dry. We batch clean, reuse solvents, and follow all hazardous disposal rules—so clients know we protect both property and the local environment.
Our Warranty, Environmental Practices, and Community Standards
As a licensed, bonded, and insured contractor, we back every painting service with a five-year workmanship warranty (exterior) and total project transparency. Our paint preparation, cleanup methods, and disposal all meet or exceed state and local environmental standards. Trust is built not only through final results, but through every brush stroke—and the way we care for the tools that bring your vision to life.
Further Reading: Our Guides to Paint Prep and Cleanup
Looking for even more tips on surface prep, trouble spots, and safe cleaning? Explore our in-depth articles on addressing paint cracking and wood rot in trim work for professional, step-by-step guidance with the Cover Pro difference.
Quick Tips: The more you invest in maintaining your brushes, the fewer you’ll buy and the better your paint jobs will look—project after project. That’s a fundamental rule at Cover Pro Painting.
South Puget Sound Region: Local Tips, Regulations, and Resources
Climate, Water Use, and Paint Removal Challenges
The South Puget Sound area sees more than its fair share of rain—which makes storm drain safety and eco-friendly cleaning especially critical. Whenever cleaning, choose minimal-water methods and immediately store solvent rinses for hazardous waste facilities.
Local Hazardous Waste Facilities and Disposal Events
Pierce, King, and Thurston counties all run municipal hazardous waste drop-offs where you can take your spent paint thinner, dirty rinse water, and used paper towels. These centers help protect local streams and keep our beautiful region healthy. For the latest locations and hours, see our service areas page or your city/county website.
Frequently Asked Questions
Can I clean all paint brushes the same way?
Not quite. The paint type determines the best cleaning methods and materials—using the wrong process can ruin your brush or harm the environment.
What happens if I pour paint water or solvents down the drain in Washington?
Local laws are strict—dumping paint waste can pollute waterways and could result in hefty fines. Proper disposal helps keep our region clean and avoids legal trouble.
How do professionals extend the life of their brushes?
Pros use the right cleaners, take time to comb and reshape bristles, and store brushes properly—not just for savings, but for consistent painting results.
Are there eco-friendly options for washing brushes?
Yes, newer plant-based and low-toxicity soaps work well for water-based paints. Always minimize water and follow local disposal guidelines.
Where can I safely dispose of paint and brush cleaning waste near Tacoma or Olympia?
Municipal hazardous waste facilities accept these materials—visit your county’s website or our resource page for up-to-date drop-off locations.
What’s the fastest way to ruin a good paint brush?
Letting paint dry in the bristles is the #1 culprit, but using harsh cleaners or bending/wringing can also destroy brush shape fast.
Is it worth buying brush-preservation products?
For frequent painters, absolutely—special soaps, combs, and storage tubes pay for themselves by saving you from frequent replacements.
Can I still use a slightly stiff brush, or is it ruined?
Don’t toss it yet—some restoration products can help, especially if you catch it early. Severe cases may need professional cleaning or replacement.