%201.svg)


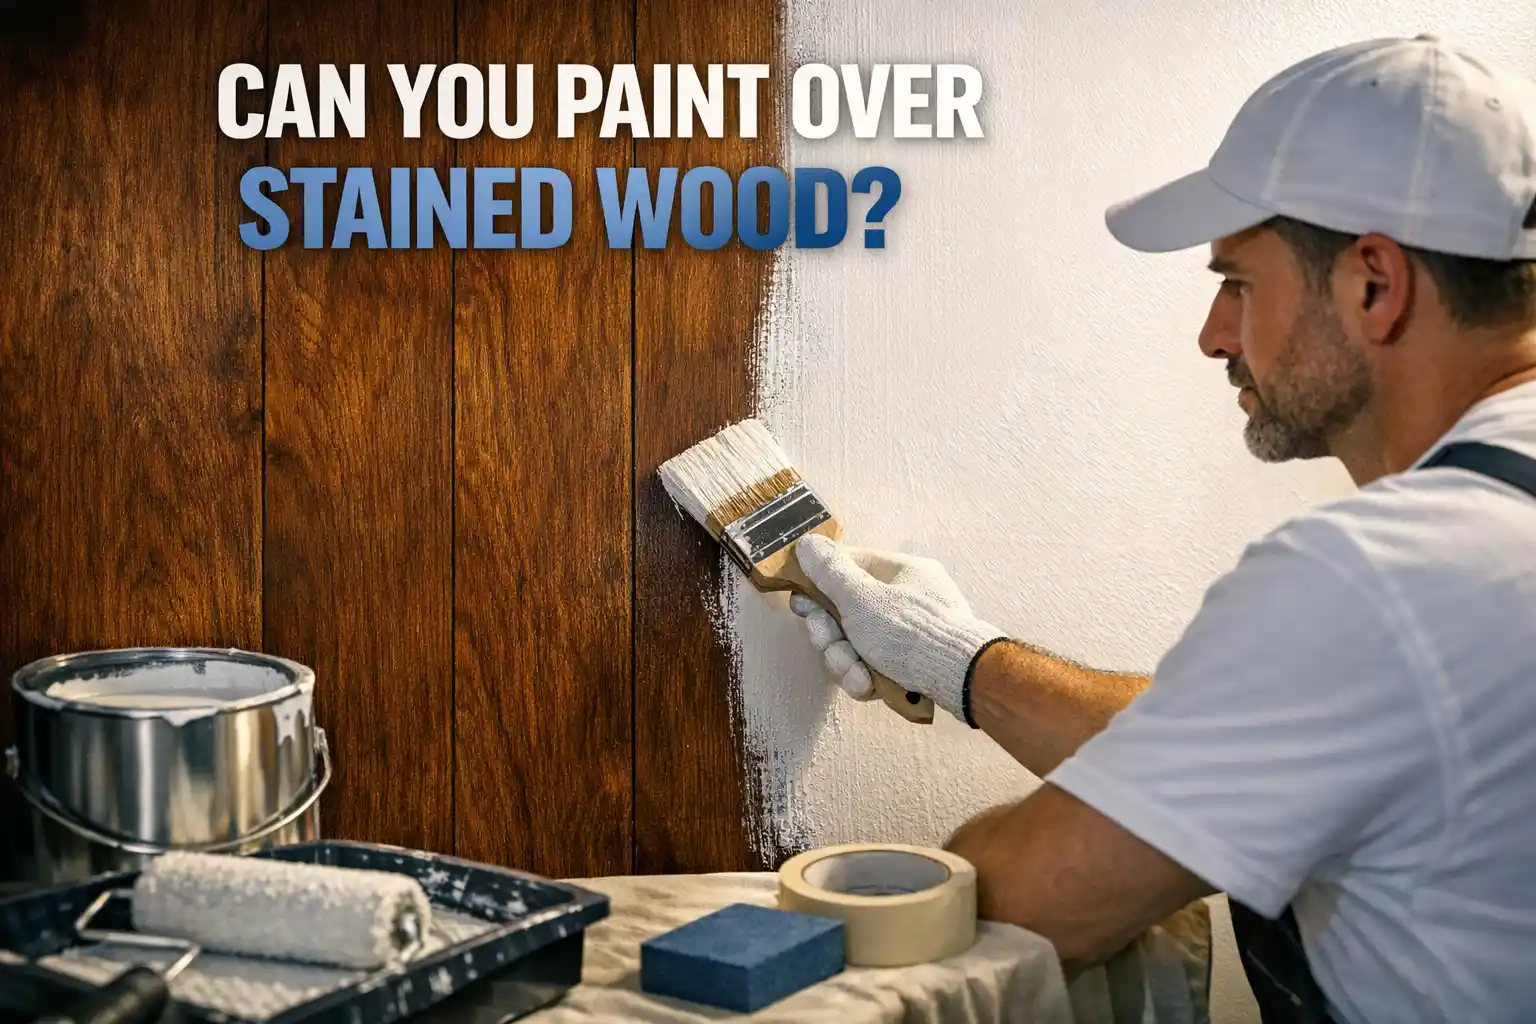
Can You Paint Over Stained Wood?
Key Takeaway:
Yes, you can paint over stained wood, but achieving a durable, professional finish requires thorough preparation using industry-standard techniques and materials. Understanding the type of stain, surface condition, and proper use of stain-blocking primers ensures your new paint adheres well and stands up to moisture, stains, and everyday use. For best results, rely on proven methods and expert insight to avoid common pitfalls and get a long-lasting result.
Introduction: The Realities of Painting Over Stained Wood in Washington
Why Homeowners Ask This Question
It’s a classic question: can you paint over stained wood and get results that last? Whether it’s an outdated banister, honey-colored trim, or deeply stained cabinets, many homeowners reach a point where they crave a lighter, modern look. But stained wood isn’t the same as unfinished lumber—preparation, materials, and execution all play a bigger role in the outcome. At Cover Pro Painting, we hear this daily. People want to avoid peeling, bleed-through, and expensive do-overs. That’s why we break down the process in plain language and back up our work with years of professional experience and a five-year workmanship warranty.
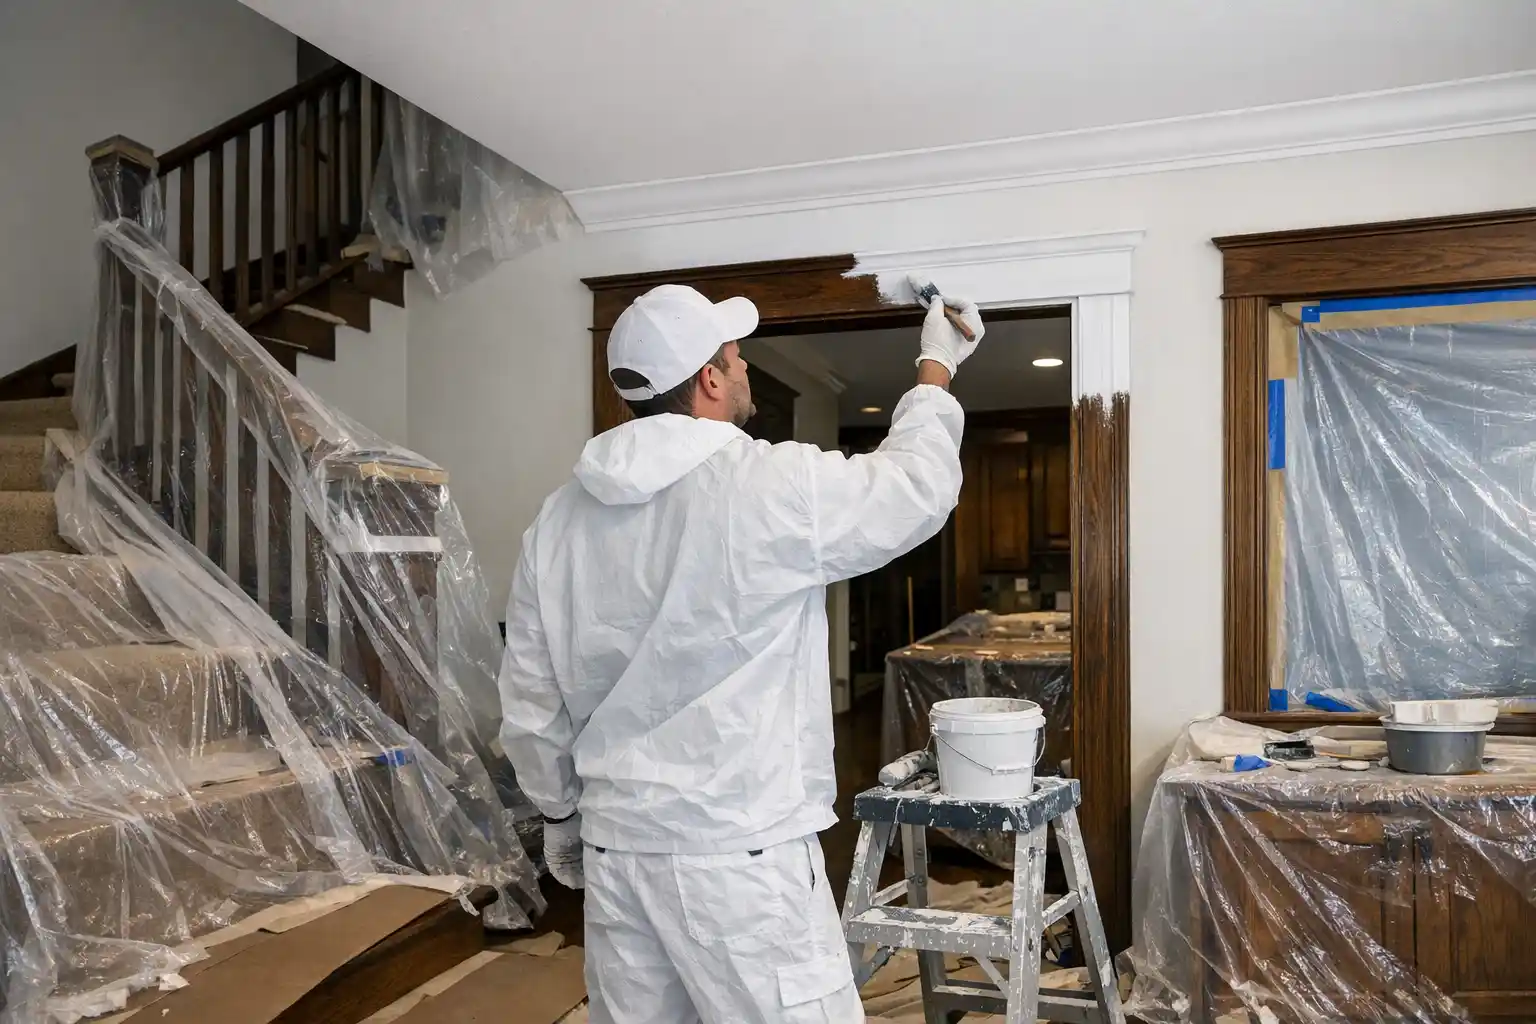
Common Projects: Cabinets, Doors, Trim, and More
Cupboards, window sills, stair rails, baseboards—these are the areas where stained wood is most likely to show its age or clash with newer décor. Whether you’re doing a single door or an entire room of old mahogany trim, the process comes down to one thing: proper prep and industry-standard application techniques. In this guide, we’ll walk you through the essential steps, from understanding the materials to finishing strong with products built to last in the Northwest climate.
What’s Different About Puget Sound Homes?
In the South Puget Sound, our wet climate and frequent freeze-thaw cycles mean wood expands, contracts, and is vulnerable to moisture—especially if cuts or joints aren’t fully sealed. Painting over stained wood here isn’t just about looks; it’s about lasting protection and healthy indoor air.
Quick Tips: Painting over stained wood is possible—and durable—but skipping prep or the wrong products will almost always lead to peeling or ugly bleed-through. Always clean, sand lightly, and use a high-quality stain-blocking primer.
Understanding Stained Wood Surfaces
Types of Wood Stains: Oil-Based vs. Water-Based
Before you start, know what you’re working with. Oil-based stains (the most common in older homes) leave a slick, penetrative finish that repels water—and paint. Water-based stains are softer and may gum up when sanded. Each requires a different touch during prep. Professional painters assess the existing finish by eye, feel, and sometimes with a quick solvent test. This step sets the tone for your entire project.
Challenges Unique to Stained Wood
Stained wood surfaces are sealed for depth and color, but these very sealants block paint adhesion. Problems like glossy polyurethanes, waxy finishes, or years of furniture polish buildup can sabotage a project. In addition, darker stains—especially on woods like mahogany and oak—can bleed through conventional primers and paints without special treatment.
Signs Your Stained Finish Needs an Update
- Noticeable surface scratches or peeling clearcoat
- Faded or patchy wood color near windows or heat sources
- Discoloration or areas sticky to the touch from cleaning oils
Quick Tips: Unsure if your stain is oil or water based? Rub a hidden spot with denatured alcohol—no color bleed usually means oil based. Knowing this helps you choose the right primer and prep method.
Is It Possible? The Short Answer—And Why Prep Is Everything

Why Some Paint Jobs Fail: Common DIY Pitfalls
The single biggest mistake people make? Skipping steps. Paint alone won’t stick long-term to stained, sealed wood. Cleaning shortcuts (like painting over dust or grease), inadequate sanding, or using latex primer over heavy stain are all recipes for peeling and frustration. Lasting professional results hinge on industry-standard terminology: substrate conditioning, adhesion testing, and selecting appropriate primers for the existing finish.
Cover Pro’s Approach to a Lasting Result
We always start with a site evaluation. Our crews respect your home—each project gets a customized prep process, based on years of jobsite experience and manufacturer best practices. We use industry-validated methods, like bonding primers and sandpaper grits designed for re-coating sealed wood, to guarantee lasting results. We’re not trying to make the wood “raw”—just ready to bond with a new coating system.
Licensing, Bonding, Insurance: Why It Matters for Your Home
When you hire Cover Pro Painting, you’re protected. We’re licensed, bonded, and insured—so you know our crews and materials have been vetted for quality. That’s not just paperwork; it means you’re never left holding the bag for a job done wrong or unexpected property issues. Learn more on our About Us page.
Quick Tips: One sure way to sabotage your project—skip primer or use "paint and primer in one" on stained wood. Always use a separate, high-adherence primer for this job.
Step-By-Step: How to Paint Over Stained Wood the Right Way
Assessing the Condition of the Existing Finish
Inspect for chips, wax, or thick polyurethane. Remove loose finishes with a putty knife, and wipe off contaminates with denatured alcohol or a degreaser. If there’s even a hint of sticky residue, repeat until surfaces are squeaky clean. Serious cracks, rot, or major water damage? Address those issues first. For structural or moisture concerns, see our guides on wood rot repair.
Essential Cleaning and Deglossing
Soap and water aren’t enough for most stained wood projects. Use a professional-grade degreaser, rinse well, and allow to dry. Next, a chemical deglosser (liquid sandpaper) can help dull slick finishes, making sanding easier and safer for intricate profiles like balusters or trim with tight corners.
Sanding: How Much Is Enough?
Sand just enough to cut the sheen—usually using 220-grit for smooth surfaces or 120-grit for heavy, gloss-sealed wood. The goal isn't complete removal of stain, but to give your primer something to "bite" into. Wipe down with a tack cloth before moving on.
The Role of Stain-Blocking and Bonding Primers
Apply a thin, even coat of stain-blocking primer—oil, shellac, or high-performance water-based if you’re in a damp area. Let dry fully (per label directions) before you test for bleed-through. Two coats may be needed for very dark woods or stubborn stains.
Why Skipping Steps Can Cost You Down the Road
Poor prep or skipping primer can lead to peeling, sticky finishes, or visible dark spots (bleed-through) within months. Fixing these issues is much harder than doing it right the first time—with more mess, dust, and cost.
Quick Tips: Use a bonding primer rated for glossy surfaces—these adhere even to tough oil-based stains and save hours compared to sanding to bare wood. Let every coat dry fully for best results.
Primer Matters: Choosing the Right Product for Maximum Adhesion
Stain-Blocking Primers vs. Bonding Primers—What’s the Difference?
Stain-blocking primers are formulated to lock in tannins, dyes, and nicotine—crucial for combating bleed-through. Bonding primers, on the other hand, are engineered to stick to slick, sealed, or glossy surfaces. Professionally, we may use both in sequence on particularly stubborn wood or heavily soiled surfaces. Reference our full primer selection process under our painting services for more detail.
Eco-Friendly Options That Work in Damp Climates
Modern water-based primers with stain-blocking and bonding capabilities now meet strict VOC regulations and work remarkably well in humid conditions—perfect for homes concerned about indoor air quality. Ask your painter for specifics on brands and industry terminology, like "low-VOC, high-adherence."
Popular Primers Used by Professional Painters
- Zinsser BIN (shellac-based) for ultimate stain-blocking
- INSL-X Stix (water-based bonding primer) for glossy cabinets and trim
- Kilz Restoration (hybrid) for nicotine, heavy tannin, or water stains
Quick Tips: Professional-grade primers may cost more upfront, but the savings in time, labor, and do-overs make them worth every penny—especially when painting over stubborn or dark stained wood.
Addressing Bleed-Through and Tannin Leaching: What Northwest Wood Needs
Identifying Woods Prone to Bleeding (Oak, Mahogany, Cedar, etc.)
Some woods, like red oak and mahogany, have high tannin content that can seep through conventional paints. These require specific stain-blocking primers, sometimes in two coats, to prevent yellowing or shadowy marks. Cedar and fir (common in older trim) can also be stubborn under white paint colors.
The Importance of Primer Quality
Not all primers are created equal—industry-standard products used by experienced painters typically outperform "big box" alternatives, especially where moisture and temperature changes are common. Even the best topcoat is only as good as the primer beneath it.
Dealing With Existing Mold and Mildew
Damp regions like the Northwest can mean hidden mold or mildew under finish coats. Clean thoroughly with a mold-killing detergent and rinse well. If you spot musty odors or black spots, choose a mold-resistant primer (some have EPA registration for added security).
When Two Coats of Primer Is a Must
If you test-paint a spot and see dark rings or yellow patches showing through after the primer dries, add a second coat. This is standard industry practice for severe tannin bleed, knotty pine, or surface residue issues.
Quick Tips: Always test your primer in a hidden area first. If in doubt—especially on old oak or mahogany—use a shellac-based product for maximum blockout. This small test can save major headaches later.
Climate-Specific Considerations for South Puget Sound Homes
How Humidity and Rain Affect Dry Times
Our local climate means adhesion and dry times are trickier than in drier regions. Moisture in the air can extend cure times, especially for water-based primers and paints. Only paint when interior humidity is below 60% (or use fans/dehumidifiers) and follow all manufacturer guidance—another reason professionals never rush the job.
Preventing Mold, Mildew, and Wood Movement
Proper product selection isn’t just about looks—it helps prevent future mold, mildew, and swelling of trim or doors as temperatures shift. We always seal cut edges, joints, and vulnerable end-grain to minimize water entry and paint failure on high-use areas.
Timing Your Project for Success
Plan ahead: for interiors, winter with indoor heat on can be ideal. For exterior trim or doors, wait for dry stretches with predictable weather. See our deeper dive on best practices for door painting in this climate.
Quick Tips: Humidity can triple drying time, so resist the temptation to rush. Always allow full cure between primer and topcoat—especially for doors or cabinets that get regular use.
Topcoat Selection: Picking the Right Paint for Stained Wood
Best Paint Sheens and Formulations for Durability
Semi-gloss and satin sheens offer maximum cleanability and moisture resistance for cabinets, trim, and doors. Look for enamel or "cabinet" grade paints engineered for hard, washable surfaces. Flat or matte finishes are best left to walls, not high-wear woodwork.
Coordinating With Existing Surfaces
For a professional, unified look, coordinate the sheen and undertone with surrounding painted items. We’re glad to help you with color selection and paint finish—see our post on choosing the perfect paint finish for more guidance.
Finishing Strong: Two-Coat Systems Explained
Two full coats of your chosen paint, applied over a fully cured primer, is the gold standard—especially when covering dark stains or switching to bright colors. This approach meets manufacturer specifications and stands up to years of use in high-traffic homes.
Quick Tips: Cheap paint looks tempting but can require extra coats and touch-ups. Invest in premium enamel or acrylic latex paints—especially for doors, trim, and cabinets—so your job lasts.
Professional vs. DIY: When to Call in the Pros

Risk Factors for Homeowners: Trim, Cabinets, and High-Use Surfaces
Some projects—like crown molding, built-ins, or kitchen cabinets—involve tricky detachment, edge sealing, and careful masking for a factory-finish result. Time, material knowledge, and tool investment can make DIY less appealing or more expensive than you’d think. For these projects, professional crews deliver superior longevity, less mess, and a written warranty.
How to Evaluate Painting Bids and Proposals
Not all bids are equal. Look for detailed proposals that specify cleaning, sanding, brand and type of primer, and number of coats. Ask for licensing, bonding, insurance credentials, and warranty details. Reputable contractors—like those at Cover Pro Painting—always lay out the full process, materials, and timetable for your review.
Internal Links: Learn More About Our Process and Warranty
Discover how our detailed prep and warranty stack up on our customer reviews page or contact us via our Contact Us form to schedule a walkthrough or get references from satisfied local clients.
Quick Tips: Pay attention to warranties—many "bargain" bids exclude bleeding, peeling, or adhesion issues on stained wood. Always request manufacturer-backed processes and written protections.
Aftercare and Maintenance for Painted-Over Wood
Cleaning and Touch-Up Tips
Use mild, non-abrasive cleaners and soft cloths. Avoid scouring pads or harsh chemicals that can dull or strip the new finish. For high-traffic trim, periodic spot touch-ups with matching paint keep surfaces looking fresh between larger refreshes.
Watching for Early Warning Signs of Failure
Monitor for any discoloration, chipping, or soft spots—especially in moist rooms or around windows. Early intervention means a quick fix, not a full redo.
How Our Five-Year Warranty Protects Your Investment
Cover Pro Painting backs every exterior project with a five-year workmanship warranty, and we honor interior work too—because peace of mind matters. If you spot a problem, just reach out. Learn more about our process and values on our About Us page.
Quick Tips: Paint performance relies on cleaning and a watchful eye—catching issues early keeps your wood protected and your home looking its best, year after year.
Conclusion: Making a Confident Choice for Your Home

Recap: Key Takeaways for a Lasting Paint Job
- Yes, you can paint over stained wood with proper preparation and primer.
- Industry-standard materials (like stain-blocking and bonding primers) and a careful hand are critical for long-term success.
- Smart timing, especially with our local weather, prevents failures later on.
- For tough projects, or if you want a true warranty, trust proven professionals.
How to Start With a Free Consultation
If you’re considering this project, don’t guess. Reach out for a walk-through—we’ll offer a straightforward assessment and options that fit your schedule and needs. Start with a quick call or visit our Contact Us page to schedule your free estimate.
Contact Us | About Cover Pro Painting
To learn about our process, values, or see other resources, visit the Cover Pro Painting Blog or get to know our team on the About Us page. We’re here to help you make confident, informed choices—no pressure, just honest advice from industry professionals.
Frequently Asked Questions
Can you paint over stained wood without sanding?
Most of the time, you’ll need at least a light sanding to help the new primer stick. For heavy gloss or oil-based stains, sanding is non-negotiable if you want the paint to last in our Northwest climate.
What primer should I use to paint over old stained wood?
Look for a high-quality stain-blocking primer—especially those marked for tannin or nicotine resistance. We recommend oil- or shellac-based primers on surfaces likely to bleed, but there are now water-based options that perform well in damp regions too.
Will dark stains bleed through paint?
Dark or reddish stains (and certain woods) can absolutely bleed through if you use the wrong primer or skip steps. Always test a spot—if you see yellowing or color showing, use a stronger stain-blocking primer.
Is it risky to paint stained wood in the rainy season?
Excess moisture can slow drying and even cause problems under the paint. We recommend waiting for a dry spell or choosing a heated, well-ventilated indoor space for your project. We’ll never rush a project when conditions aren’t right.
How do I know if my stained wood has mold or mildew?
Look for dark spots, musty odors, or any flaking under the stained finish. If in doubt, clean thoroughly and consider a mold-resistant primer, especially here in the South Sound.
Do painted-over stained cabinets need special cleaning?
Yes—mild soaps and non-abrasive cloths work best. Avoid harsh chemicals or scouring pads to keep your new finish looking fresh.
How long will the paint job last?
Done right—with proper prep and materials—you should get many years. For exteriors, Cover Pro Painting backs our work with a five-year warranty on workmanship for peace of mind.
Can I change a dark, stained trim to a bright white easily?
It can take two coats of primer and two coats of paint to fully cover darker stains, but it’s absolutely possible with patience and the right products. We’ve transformed plenty of dark trim over the years.
When should I hire a professional instead of DIY?
Complicated profiles, built-ins, or high-value woodwork demand extra care. If you’re not confident about sanding, priming, or matching finishes, a professional touch often pays off.
What makes Cover Pro Painting different for this type of project?
We combine old-school prep with modern materials, pay attention to NW climate realities, and back every exterior job with a written warranty. Our crews care for your home as if it were their own.