%201.svg)


What Surfaces Require Special Treatment Before Exterior Painting?
What Surfaces Require Special Treatment Before Exterior Painting?
When homeowners ask what surfaces require special treatment before exterior painting, the answer always comes back to one thing: preparation. A successful exterior painting project depends on how well each surface is cleaned, repaired, and stabilized before the first coat goes on. Paint is not a fix for underlying problems. It is a protective layer that performs best when it is applied over a sound surface. Without proper surface preparation, even the best exterior paint will fail. You may see peeling, cracking, stains, or uneven texture much sooner than expected.
At Cover Pro Painting, we approach every project with a focus on preparation first. That means evaluating exterior surfaces, identifying moisture issues, removing dirt, and making sure each material is ready to accept paint. This guide explains what surfaces require special treatment before exterior painting and how proper preparation creates durable results.
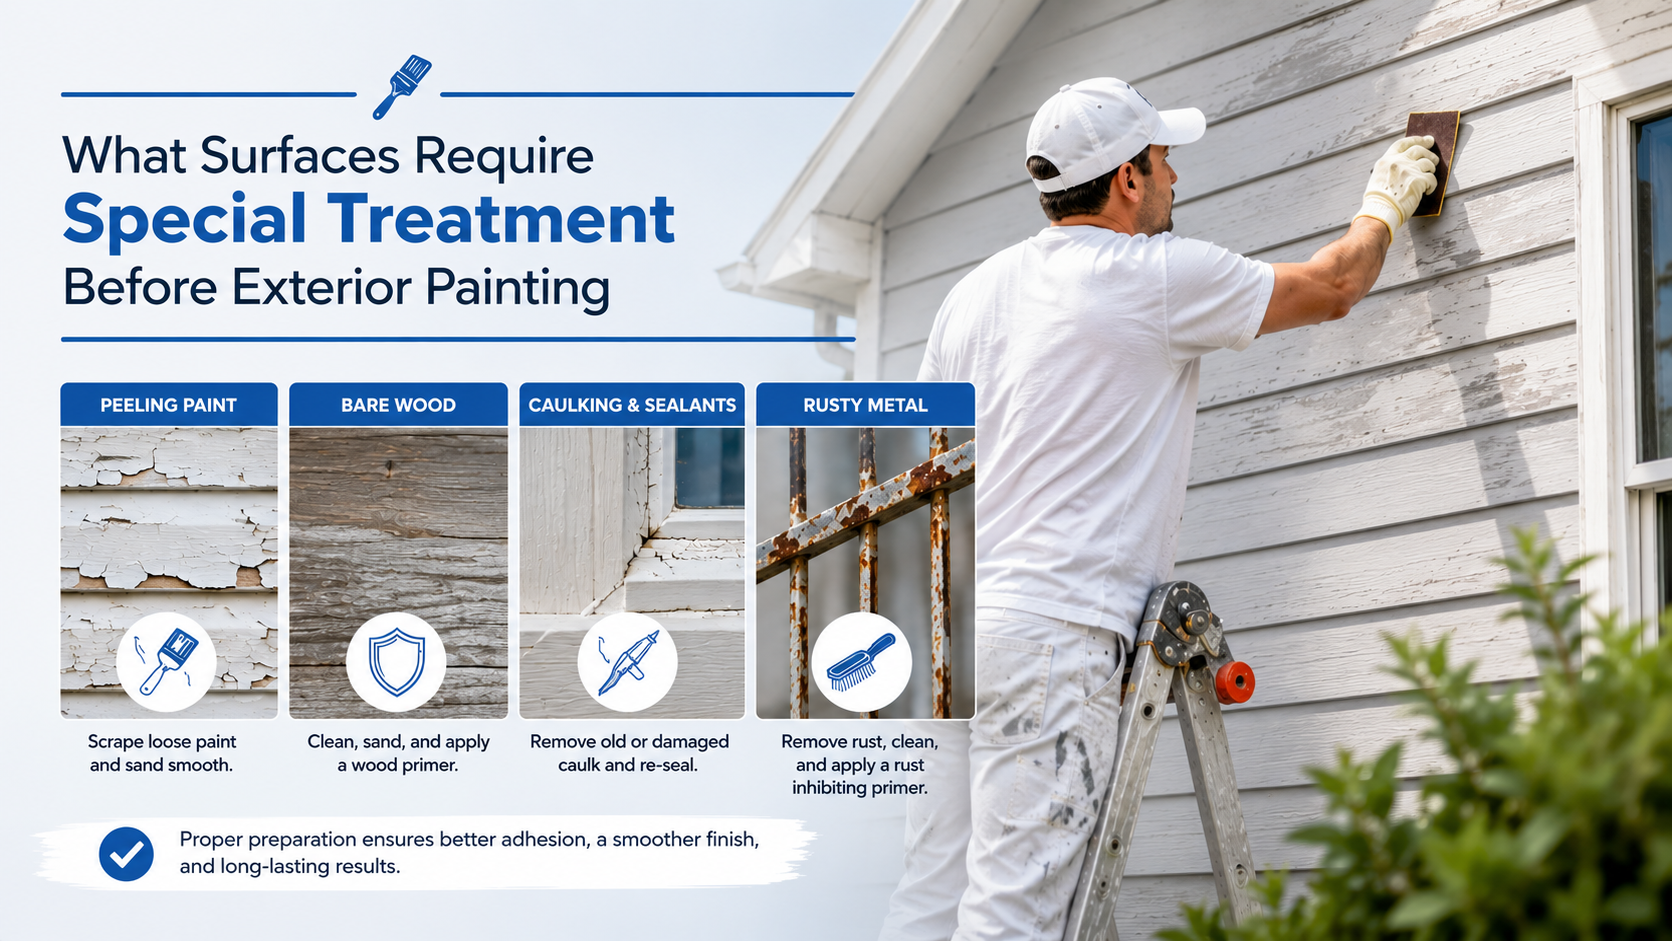
Quick Overview: Surfaces Requiring Special Attention
Several exterior surfaces require special attention before applying exterior paint. These include:
- Exterior wood
- Areas with peeling paint
- Stucco, brick, and concrete
- Vinyl siding and vinyl surfaces
- Metal surfaces
- Any surface affected by mold or mildew
Each surface has its own preparation process. Proper surface preparation ensures strong paint adhesion, creates a stable base, and helps the entire coating system perform as intended.
Why Some Surfaces Can’t Be Painted the Same Way
The Role of Adhesion
Paint adhesion depends on the condition of the surface. A smooth surface may resist bonding, while a porous material absorbs paint unevenly. Proper preparation creates a balance, allowing the paint to bond evenly. Without adhesion, the coat will not hold and may fail quickly.
The Impact of Moisture and Contamination
Moisture is one of the biggest causes of paint failure. Dirt, grease, dust, mold, mildew, and other foreign matter prevent the paint from bonding. Surface contaminants must be removed through washing, pressure washing, or solvent cleaning to ensure a clean surface.
Why Prep Work Determines Paint Lifespan
A well-prepared surface can hold paint for years. Poor preparation leads to repainting sooner than expected. Property owners often underestimate how much preparation impacts the final result. Good adhesion starts with a clean surface and proper preparation.
Bare Wood and Weathered Surfaces Need Full Preparation
What Happens to Wood When It’s Exposed
Exterior wood breaks down over time due to temperature changes and moisture exposure. The surface becomes rough, with cracks and loose fibers. Dirt and dust settle into the grain, affecting adhesion and the ability of paint to bond correctly.
Required Preparation Steps
- Sanding removes damaged fibers and helps create a smooth surface.
- Washing removes dirt, dust, stains, grease, and surface contaminants.
- Primer seals the wood and prepares it for the first coat of paint.
Consequences of Skipping These Steps
Skipping preparation leads to peeling paint, poor adhesion, and uneven coverage. The paint may not create a durable finish and will fail early.
Surfaces With Rot or Soft Wood Require Repair Before Painting
Why Painting Over Rot Doesn’t Work
Rot is caused by moisture trapped inside the wood. Professional rot damage repair services address the underlying moisture issues and structural damage so painting does not simply cover up the problem. It continues to spread beneath the coating and weakens the structure.
Professional Rot Repair Process
- Remove damaged material and replace where necessary.
- Use patching material to rebuild small areas.
- Sand and clean to create a stable base.
- Apply primer before painting.
These repaired areas must be stable and clean before any coat is applied.
Common Areas Where Rot Appears
Rot is often found in trim, siding, and around windows. These areas are exposed to moisture and require proper preparation.
Peeling, Cracking, or Failing Paint Must Be Removed
Why New Paint Won’t Bond to Failing Layers
Old paint that is peeling or unstable cannot support new paint. The entire coating system depends on a sound surface.
Proper Surface Correction
- Remove loose paint using scraping or power tool cleaning.
- Sand to smooth edges and create a uniform surface.
- Clean away dust, dirt, and debris.
- Apply primer to ensure adhesion.
When Full Removal Is Necessary
If peeling paint is widespread, full removal may be required to expose the substrate and allow proper adhesion of the new paint.
Stucco and Masonry Require Specialized Preparation and Coatings
Why These Surfaces Are Different
Stucco, brick, and concrete are porous materials. They absorb moisture and develop cracks over time. These surfaces require proper surface preparation to prevent long-term issues.
Proper Preparation Steps
- Pressure washing removes dirt, dust, mold, mildew, and stains.
- Repair cracks using the correct patching material.
- Allow the surface to dry fully before priming.
Choosing the Right Coating
Elastomeric coatings are often used on stucco and concrete. These coatings expand and contract with temperature changes and help protect the surface.
Metal Surfaces Require Rust Removal and Protective Primers
Where Metal Is Found on Homes
Metal surfaces include railings, flashing, trim, and galvanized metal components.
Preparation Process
- Remove rust using wire brushes, sanding, or abrasive blasting.
- Use solvent cleaning to remove grease, dirt, and foreign matter.
- Apply a rust-inhibiting primer.
- Apply paint once the surface is clean and stable.
Consequences of Skipping Preparation
If rust is not removed, it will continue to spread under the paint and cause stains and coating failure.
Vinyl and Composite Siding Require Adhesion-Specific Preparation
Why Paint Struggles to Stick
Vinyl siding and plastic materials are smooth and non-porous. Without proper preparation, adhesion problems can occur.
Cleaning and Surface Preparation
- Use a commercial cleaner or cleaning solutions to remove dirt, grease, and mildew so the surface is properly prepped before painting day.
- Pressure washing removes dust and debris.
- Ensure the surface is clean and dry before priming.
Paint Selection Considerations (2025 Update)
Vinyl surfaces require the right exterior paint to handle temperature changes. Using the wrong product can damage the siding.
Mold, Mildew, and Algae Must Be Fully Treated
Why It Returns Under Paint
Mold and mildew grow in areas with moisture. If not fully removed, they return under the paint layer.
Proper Cleaning Process
- Apply cleaning solutions designed to kill mold and mildew.
- Wash the surface thoroughly.
- Allow full drying before applying primer and paint.
Risks of Skipping This Step
Skipping this step leads to stains, peeling, and poor adhesion.
Glossy or Previously Sealed Surfaces Need De-Glossing
Common Problem Areas
Glossy surfaces include trim, doors, and areas with existing coatings. These surfaces prevent proper adhesion.
Preparation Methods
- Sanding to dull the surface and create texture.
- Solvent cleaning to remove grease and contaminants.
This process helps create a smooth but receptive surface for paint.
How Professionals Handle Surface Preparation the Right Way
Step 1: Full Exterior Inspection
Professional painters evaluate the entire exterior surface to identify cracks, moisture, and problem areas.
Step 2: Cleaning and Surface Treatment
Pressure washing, washing, and cleaning remove dirt, dust, grease, mold, mildew, and other foreign matter.
Step 3: Repairs and Stabilization
- Repair cracks in stucco, brick, and concrete.
- Replace or repair damaged wood.
- Apply caulk around windows and trim.
Step 4: Priming and Sealing
An appropriate primer is applied to each material. This step ensures proper adhesion and creates a stable base for paint.
Why This Process Matters for Long-Term Results
Proper preparation leads to a durable finish. The entire coating system relies on a clean surface and correct preparation.
Signs Your Home Needs Extra Preparation Before Painting
Visual Signs
Peeling paint, cracks, stains, and discoloration are clear signs that preparation is needed.
Physical Signs
Soft wood, chalky residue, moisture buildup, and dust accumulation indicate deeper issues with the surface.
When to Call a Professional Painter
If multiple problems are present, professional painters in Seattle can identify the best preparation process for your project.
Common Exterior Painting Preparation Mistakes Homeowners Make
Property owners often skip cleaning or fail to remove loose paint instead of working with a trusted painting company in Newcastle that prioritizes thorough prep. Painting over dirt, grease, dust, or mildew leads to poor adhesion. Ignoring surface preparation results in repainting sooner and reduces the lifespan of the paint.
Why Proper Preparation Saves You Money
- Longer Paint Lifespan: A properly prepared surface allows paint to last longer and reduces repainting.
- Reduced Maintenance: Less peeling, fewer stains, and fewer repairs over time.
- Protecting Your Home’s Structure: Repairing damaged material prevents moisture from causing further issues, especially when handled by a trusted painting company in Tacoma.
- Maintaining Warranty Coverage: Proper preparation protects the integrity of the entire coating system, as emphasized by our Newcastle painting contractors.
Work With a Team That Prepares Your Home the Right Way
At Cover Pro Painting, every exterior project starts with preparation, backed by our professional painting and rot repair expertise. We focus on cleaning, repairing, sanding, and priming each surface to ensure lasting results. Our team understands how different materials respond to paint and how to create a durable finish. From wood and siding to concrete and stucco, we prepare every surface with care as part of our comprehensive Tacoma interior and exterior painting services. That approach leads to better adhesion, a longer-lasting coat, and a clean final result. If you are planning your next painting project, we are ready to help.
Frequently Asked Questions
Do all exterior surfaces need primer before painting?
Most surfaces benefit from primer, especially when dealing with new material, repaired areas, or adhesion concerns.
Can you paint over peeling paint?
No. Peeling paint must be removed to create a stable base for new paint.
How do I know if my house has rot?
Look for soft wood, cracks, or moisture around trim and windows.
Is pressure washing enough before painting?
Pressure washing is important, but full preparation includes cleaning, repairs, sanding, and priming.
What happens if I skip prep work?
Skipping preparation leads to peeling, poor adhesion, and early repainting.
How long should exterior paint last?
With proper preparation, exterior paint can last for many years.
Can vinyl siding be painted safely?
Yes, with proper preparation and the right materials, vinyl siding can be painted successfully.
What type of paint works best for stucco?
Elastomeric coatings are ideal for stucco because they handle cracks and provide a durable finish.
Final Thoughts
Every exterior painting project depends on preparation. Understanding what surfaces require special treatment before exterior painting helps property owners make better decisions. From cleaning and sanding to priming and repairing, each step plays a role in creating a durable and long-lasting finish. When the surface is properly prepared, the paint performs as expected and protects your home for years.