%201.svg)


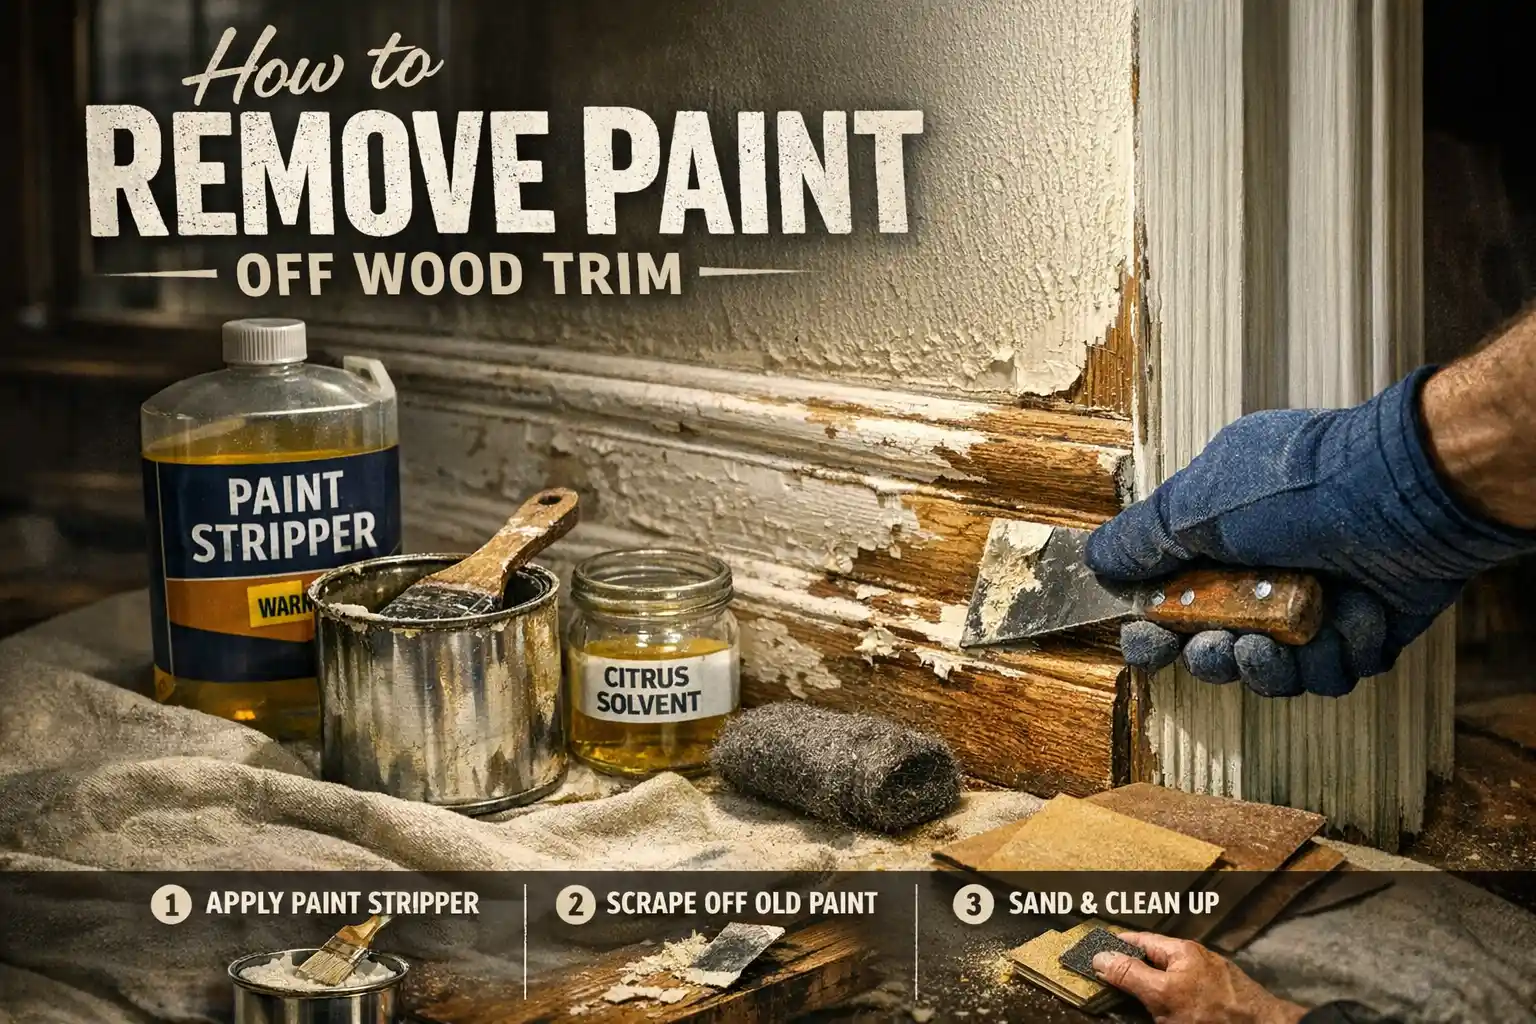
The Ultimate Guide on How to Remove Paint Off Wood Trim
Key Takeaway:
Learn expert methods to safely remove paint off wood trim, considering wood species, paint types, and eco-friendly solutions, while avoiding common pitfalls.
The Ultimate Guide on How to Remove Paint Off Wood Trim
Understanding Wood Trim and Paint Types
Identifying Wood Species
Understanding the type of wood trim you're working with is crucial. Common species include oak, pine, and cherry, each reacting differently to paint removal methods. Oak, for example, is dense and sturdy, making it more resilient to aggressive methods like sanding, while pine is softer and requires a gentler approach. Identifying the wood type helps in choosing the right removal technique to maintain the wood's integrity. For instance, cherry wood, known for its fine grain and rich color, might require a more delicate touch to preserve its natural patina and avoid discoloration during the paint stripping process.
Types of Paint Used on Trim
Wood trim can be coated with various paint types, including latex paint, oil-based paint, and shellac-based finishes. Latex paint is water-based and generally easier to remove, while oil-based paint is more durable and may require stronger methods like chemical strippers. Understanding the paint type informs the removal process, ensuring the original finish of your woodwork is preserved. For those dealing with older homes, it is crucial to test for lead paint, especially if the house was built before 1978, as this may necessitate specific safety protocols and removal techniques.
Preparation: Essential Steps Before Removal
Safety Precautions
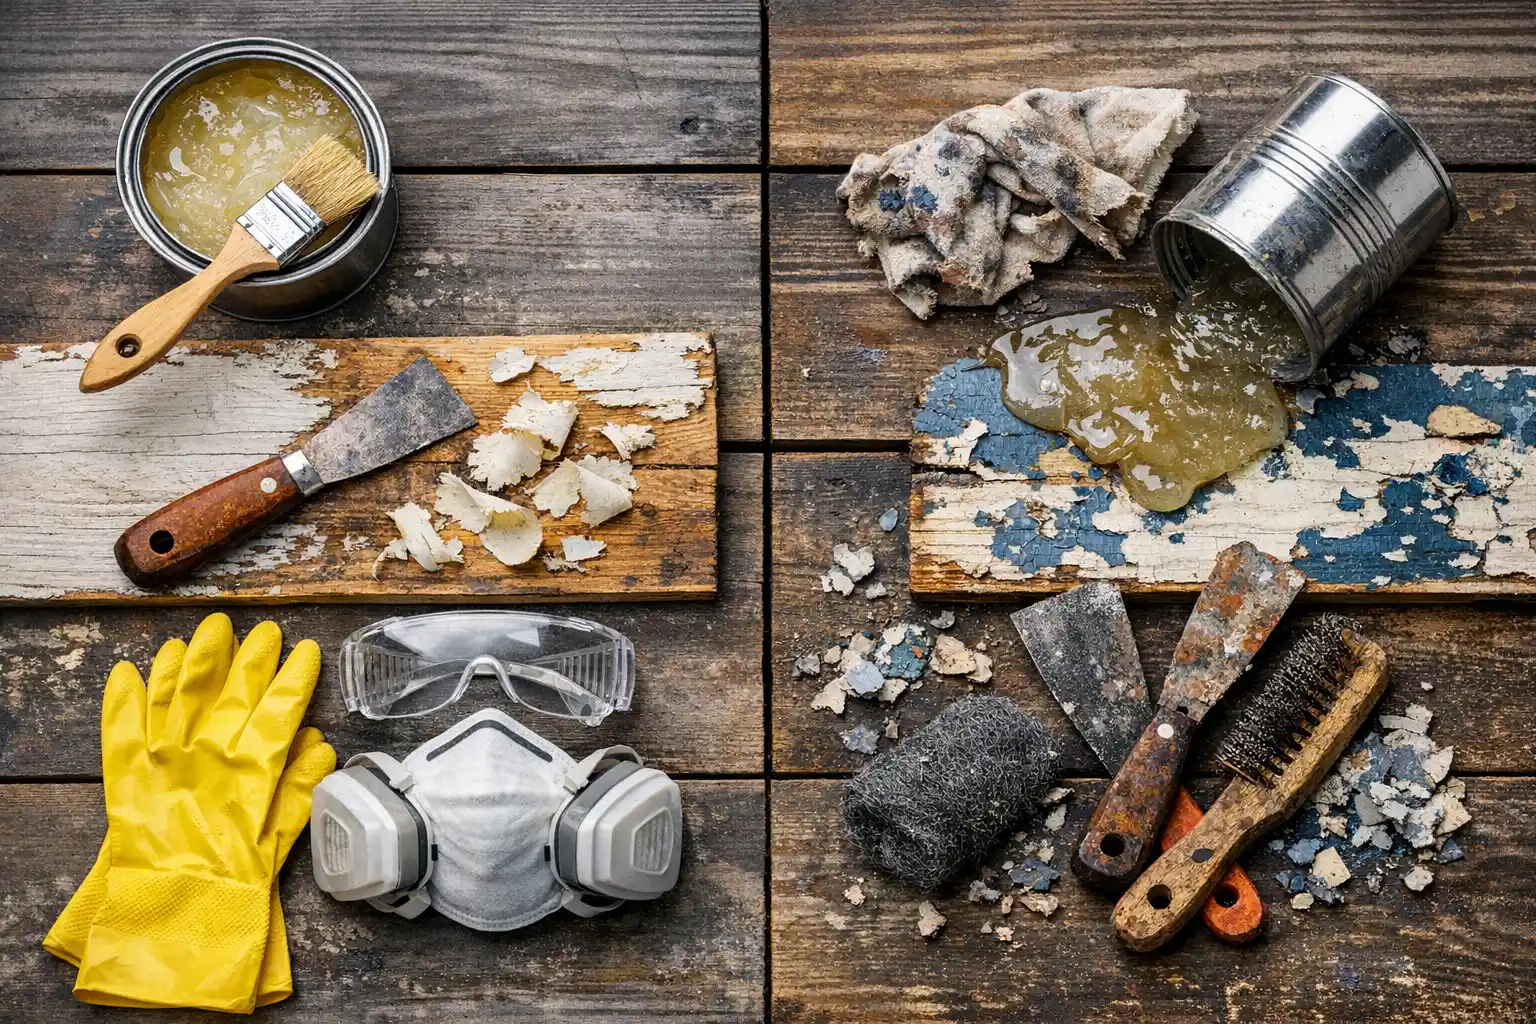
Before removing paint, prioritize safety. Wear protective gear such as gloves, goggles, and masks to shield yourself from chemicals and dust. If your house was built before 1978, assume lead paint may be present and follow lead-safe practices. Testing a small, inconspicuous area first can help determine the best approach. Additionally, ensuring proper ventilation when using solvents or a heat gun is vital to reduce exposure to potentially harmful fumes, which can pose significant health risks if inhaled over prolonged periods.
Tools and Materials Needed
Gather essential tools and materials, including a heat gun, paint thinner, denatured alcohol, sandpaper, and mineral spirits. Having masking tape and a drop cloth will protect areas you wish to keep paint-free. A fine brush or cloth can help in applying solvents, while a scraper assists in peeling off paint layers. For more intricate woodwork, consider using a variety of scrapers and brushes to effectively remove paint from corners and crevices without damaging the underlying wood.
Quick Tip: Always test your chosen method on a small area to ensure it doesn't damage the wood or finish. This step can save you from costly mistakes.
Chemical Paint Strippers: Pros and Cons
Best Practices for Use
Chemical paint strippers can be effective for stubborn paint layers, particularly oil-based paint. Apply the stripper with care, allowing it to sit for the recommended time before scraping away the softened paint. Follow instructions meticulously to avoid damaging the wood trim. When working with chemical strippers, consider using a plastic scraper to minimize the risk of scratching or gouging the wood surface, thus preserving the wood's original charm.
Safety and Disposal Regulations
Using chemical strippers requires adhering to safety and environmental regulations. In Seattle, proper disposal of hazardous materials is crucial. Ensure chemicals are sealed and disposed of at designated hazardous waste facilities to minimize environmental impact. Additionally, always store leftover chemicals in a cool, dry place, away from children and pets, to prevent accidental exposure or spillage.
Sanding Techniques for Paint Removal
Choosing the Right Sandpaper
Select sandpaper based on the paint and wood type. Coarse grit is suitable for initial paint removal, while fine grit sandpaper is ideal for smoothing the wood trim surface. Sand lightly to avoid removing too much wood or damaging the trim's original finish. For intricate details or delicate woodwork, using a sanding block can provide better control and precision, reducing the risk of over-sanding particular areas.
Manual vs. Power Sanding
Manual sanding offers greater control, making it suitable for intricate woodwork and corners. However, power sanding is efficient for larger, flat areas. Consider the room and specific trim features when deciding between these methods to achieve the best results. For example, manual sanding might be more appropriate for older, historic homes where preserving the original detail is paramount, while power sanding could be ideal for modern settings with simpler trim designs.
Using Heat Guns for Paint Removal
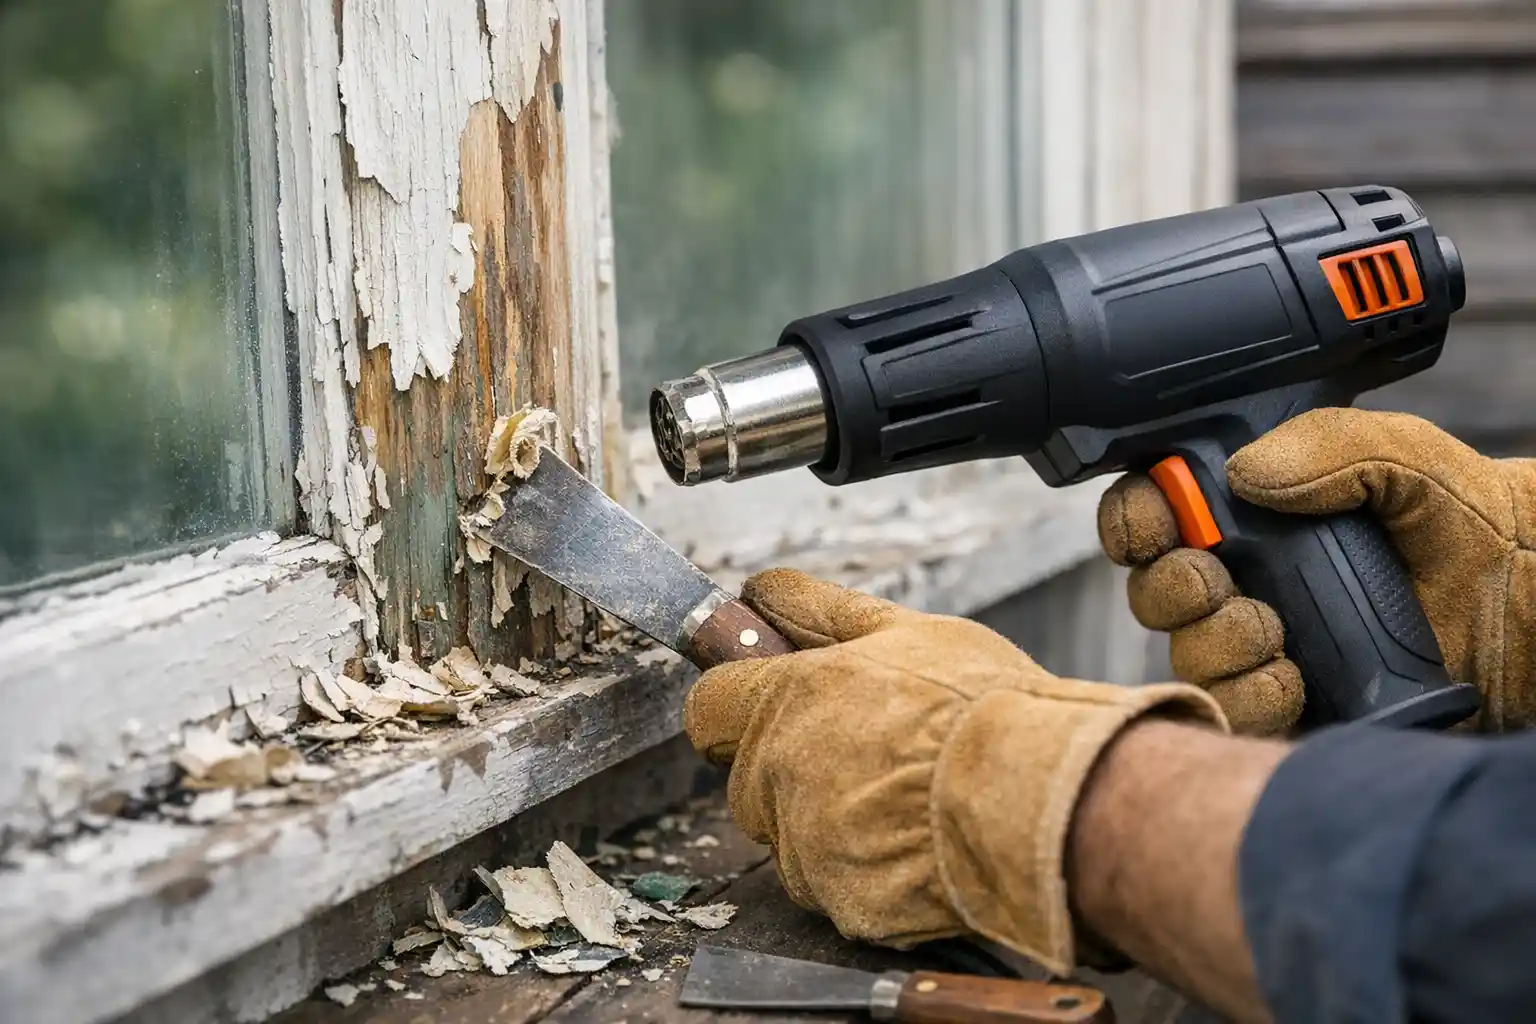
How to Use a Heat Gun Safely
A heat gun can effectively loosen paint, allowing for easy scraping. Keep the heat gun moving to avoid scorching the wood, and maintain a safe distance to protect the original finish. Always work in a well-ventilated area and wear appropriate protective gear. It's also advisable to have a bucket of water or a fire extinguisher nearby, particularly when working with dry woods or in areas with high flammability risk.
When to Avoid This Method
Heat guns are not recommended for paint removal in tight, enclosed spaces or on delicate wood trim that may scorch easily. Avoid using heat guns on lead paint due to the risk of releasing harmful fumes into the air, opting instead for safer chemical methods. In cases where a heat gun might be inappropriate, consider using a combination of chemical strippers and manual sanding to achieve the desired results without compromising safety.
Quick Tip: When using a heat gun, have a fire extinguisher nearby as a precaution, especially when working with old, dry wood that may ignite.
Eco-Friendly Paint Removal Solutions
Latest Products in 2026
Eco-friendly paint removers have advanced significantly, offering effective solutions without harmful chemicals. Look for products labeled biodegradable and low-VOC (volatile organic compounds) to minimize environmental impact while maintaining effectiveness. These products not only reduce environmental footprint but also often have less offensive odors, making them more pleasant to use indoors, especially in occupied homes or businesses.
Benefits of Eco-Friendly Options
Choosing eco-friendly paint removal products reduces exposure to toxic chemicals and supports sustainable practices. These products often have less odor and are safer to use indoors, aligning with a growing preference for environmentally conscious home improvement methods. Furthermore, eco-friendly solutions can contribute to better indoor air quality, a critical factor for households with children, elderly residents, or those with respiratory issues.
Technical Deep Dive: Understanding Paint Layers
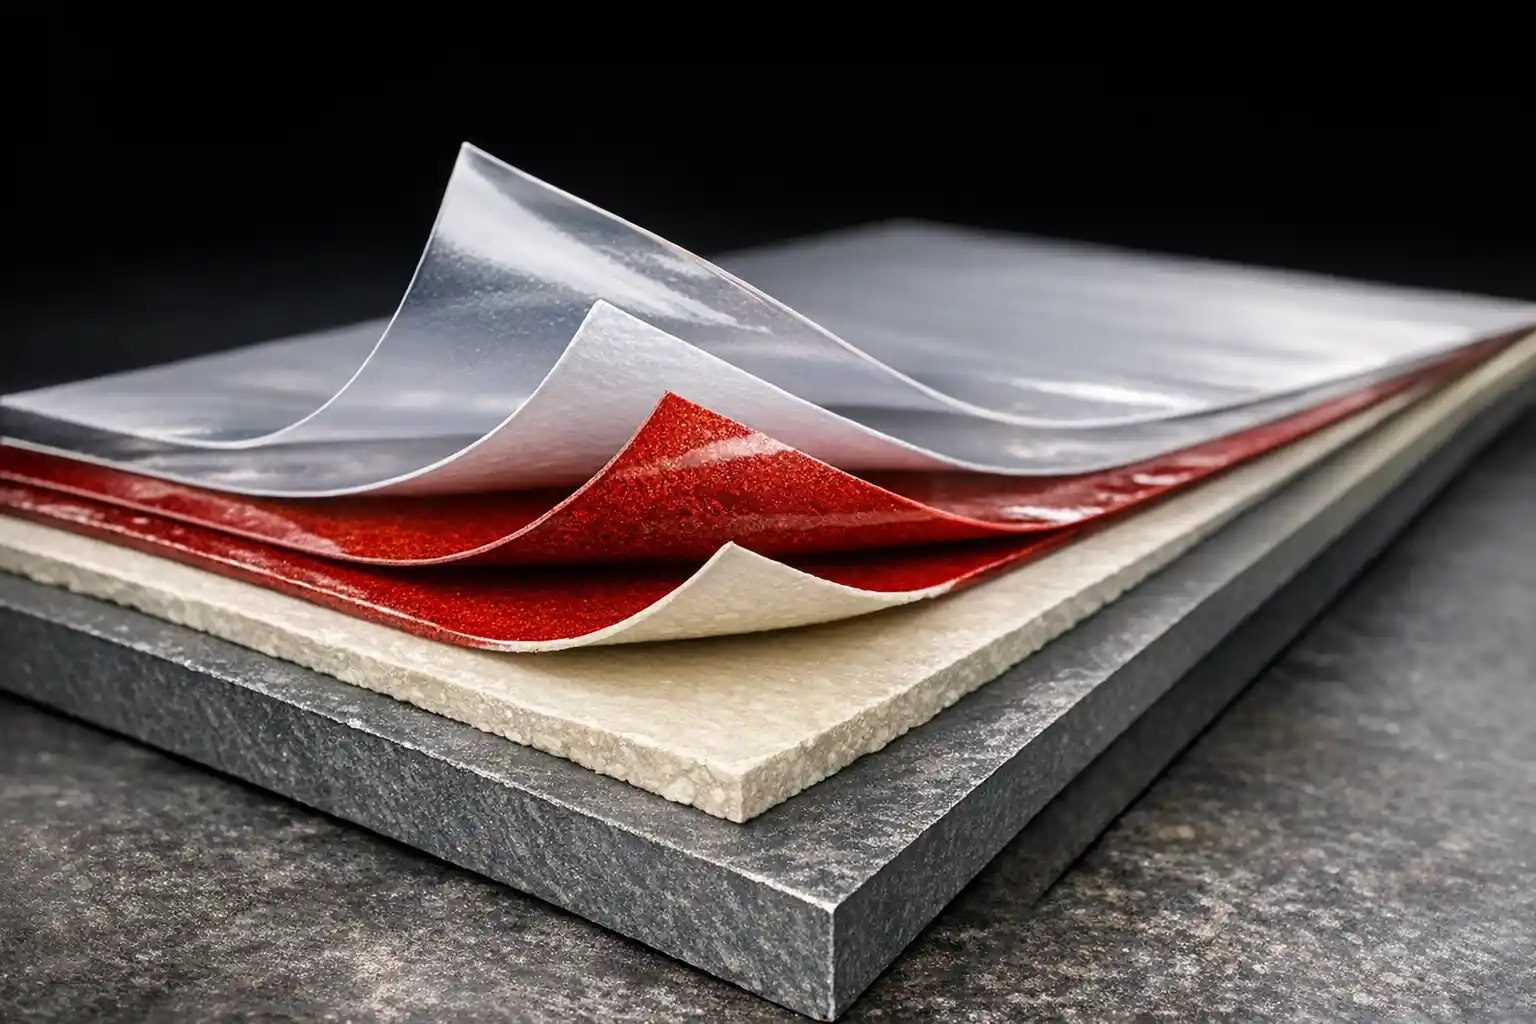
Analyzing Layer Composition
Paint layers can vary, with some wood trim having multiple coats of latex paint, while others may have a combination of oil-based paint and varnish. Understanding the composition helps tailor the removal method, ensuring each layer is addressed effectively. If the trim features multiple paint layers, consider a multi-step process, beginning with chemical strippers to soften the outer layers, followed by sanding or heat application to remove deeper residues.
Impact on Removal Techniques
Thicker or multiple paint layers may require a combination of methods such as chemical stripping followed by sanding. Recognizing the layer structure allows for more efficient removal, preserving the trim's original patina and avoiding unnecessary damage. Testing small sections with various techniques can help determine the most effective strategy for the trim in question, ultimately preserving the aesthetic and structural integrity of the wood.
Common Pitfalls and Mistakes to Avoid
Avoiding Damage to Wood
One of the most common mistakes in paint removal is using overly aggressive methods that damage the wood. Always start with the least invasive technique, such as denatured alcohol, before progressing to stronger methods. Patience is key to preserving the trim's integrity. To prevent accidental gouging or scratching, use plastic scrapers instead of metal ones and ensure that any power tools are set to the appropriate speed and pressure settings.
Handling Stubborn Paint
For stubborn paint that won't peel easily, reapply the chosen method or try a different approach, such as adding a layer of mineral spirits to soften the paint. Avoid forceful scraping, which can gouge the wood, and consider professional help if needed. In cases of exceptionally stubborn paint, combining chemical and mechanical methods can yield better results, ensuring a clean, smooth surface ready for refinishing.
Quick Tip: If you're struggling with stubborn paint, a layered approach combining chemical strippers and careful sanding often yields the best results.
Cost Analysis: DIY vs. Professional Services

Estimating DIY Costs
DIY paint removal can be cost-effective, with expenses primarily for materials like paint strippers, sandpaper, and protective gear. However, consider the time investment and potential for mistakes, which can lead to higher costs in the long run. DIY projects may also lack the precision and expertise of professional services, potentially compromising the final appearance of the wood trim.
When to Hire a Pro
Hiring professional services ensures expertise and high-quality results, especially for complex projects or when dealing with lead paint. While more expensive upfront, professionals can save time and prevent costly errors, offering peace of mind with their workmanship warranty. Additionally, professionals typically have access to superior-grade tools and materials, which can enhance the overall outcome and longevity of the project.
Maintaining Wood Trim After Paint Removal
Best Sealants and Finishes
Post-removal, protect your wood trim with sealants like varnish or shellac to preserve its appearance and durability. Consider the room environment and exposure to elements when selecting a finish to ensure long-lasting protection. For areas exposed to high moisture or sunlight, choosing a UV-resistant varnish can help in maintaining the wood's appearance and preventing fading or cracking over time.
Routine Maintenance Tips
Regular maintenance involves inspecting the wood trim for signs of wear or damage and reapplying protective finishes as needed. Avoid harsh chemicals when cleaning, and use fine, damp cloths for routine care to maintain the wood's natural beauty. Scheduling periodic inspections and touch-ups can prevent minor issues from escalating, preserving the trim's structural and aesthetic qualities for years to come.
Frequently Asked Questions
What are the best eco-friendly paint removers available in 2026?
The most effective and sustainable options include biodegradable and low-VOC products designed to safely remove paint without harmful chemicals.
How do I safely dispose of chemical paint strippers in Seattle?
Follow Seattle's local regulations by sealing used chemicals in their original containers and taking them to designated hazardous waste facilities for proper disposal.
Is it better to sand or use a chemical stripper on wood trim?
The choice depends on the paint type and wood condition. Chemical strippers are effective for thick layers, while sanding is ideal for lighter coats and delicate wood.
Can heat guns damage my wood trim?
Yes, if not used carefully. Keep the heat gun moving and at a safe distance to prevent scorching, and avoid using on lead paint.
What should I do if the paint won't come off completely?
Try reapplying the removal method or switch to a different technique. Consider professional help if the paint remains stubborn.
Local Expertise for South Puget Sound Residents
At Cover Pro Painting, we understand the unique challenges of maintaining wood trim in the South Puget Sound area. Our experienced team offers personalized services, whether you're looking to address wood rot in window sills or need advice on choosing the right paint for siding repairs. Explore our services to learn more about our commitment to quality craftsmanship and customer satisfaction. For homeowners looking to enhance the longevity and appearance of their woodwork, our expert team provides tailored solutions, ensuring each project meets the highest standards of excellence.