



Wall Stencils for Painting: How to Choose a Design and Get Crisp, Clean Results

Key Takeaway
Wall stencils for painting are reusable or single-use templates that let you add repeating patterns, borders, or motifs to any wall without wallpaper. Surface preparation accounts for roughly 80% of a crisp result, so clean, smooth, fully dry walls matter more than artistic skill. Keep your roller or brush nearly dry, apply light passes, and lift the stencil while paint is still wet for sharp, clean edges.
Wall stencils are reusable or single-use templates that let you paint a repeating pattern, border, lettering, or a single motif directly onto a wall. They're a flexible way for homeowners planning an accent wall or a patterned room to add character without hanging wallpaper. Here's the part most guides skip: a crisp result depends far more on wall condition and paint control than on artistic talent. If your surface is clean, smooth, and fully dry, and you keep your roller or brush nearly dry, you'll get sharp edges whether or not you can draw a straight line.
There are two core choices. Reusable Mylar wall stencils can be moved across a space to repeat a design, and they clean up for the next project. Single-use or adhesive-backed stencils are usually chosen for lettering or detailed one-time designs. Start with the wall, not the stencil, and the rest of the painting gets easier.
Are Wall Stencils Right for Your Blank Wall?

Before you add anything to a cart, run through this quick self-check. The answers shape which design, paint, and tools will actually work for your room.
- Is your wall smooth or textured?
- Do you want a small motif or an allover pattern?
- Is the design organic (floral, botanical) or precise geometry?
- One color, or a multi-layer design?
- An accent wall, or the whole room?
- High-traffic or low-traffic space?
- Is the height and access DIY-friendly?
- Is the existing paint sound and fully dry?
Each style delivers a different look. Floral and botanical designs that draw on nature read fresh and calming. Geometric designs add structured, modern interest. An oversized botanical or mural stencil can completely transform a blank wall into a true feature and change the whole feel of a space. Match the design to the room's mood and your wall's condition, and you're already ahead.
How to Choose the Right Wall Painting Stencil
This is where the shopping decisions matter, and a quick look at the options will save you time. The first choice is reusable Mylar versus adhesive-backed vinyl. Reusable Mylar is built for repeated placements and wipes clean, which makes it the better value when you're covering a wall or planning more than one painting project. Adhesive vinyl sticks flat on its own and suits detailed, one-time work like lettering.
Pay attention to pattern scale and repeat size. A large motif reads calmer across a wall; a dense small repeat demands far more placements and alignment. Look for registration marks, which are small guides that line each placement up with the last one so the pattern doesn't drift as you work across the wall. Many allover wall stencils also include a separate ceiling or edge filler piece, which is far easier to position in a tight gap than bending a full sheet. Take time to browse the repeat styles that fit your home before you commit.
Single-layer designs use one color and one placement. Multi-layer designs build a richer look with separate overlays, and they take more time and precision. On walls that aren't perfectly smooth, organic patterns forgive small edge variation better than hard straight-line geometry.
You'll see thickness listed in "mil." One mil equals 0.001 inch. A 7-mil sheet (about 0.18 mm) is flexible and easy to position; a 10-mil sheet (about 0.26 mm) is sturdier for repeated use. These are common options, not a required standard, and thicker isn't automatically better. A flexible sheet can hug a corner more easily and is simpler to cut around an obstacle if you ever need to.
Prep the Wall First (This Is 80% of a Crisp Result)

Surface preparation accounts for roughly 80% of a crisp stencil finish. A stencil only sits flat on a wall that's clean, smooth, dry, and sound. Here's the sequence:
- Clean away dust and grime so the stencil and tape adhere.
- Inspect for loose paint, cracks, patches, and ridges.
- Repair and sand where needed, then spot-prime those repairs.
- Apply a compatible base coat if the wall needs one.
- Follow the paint label before applying tape or adhesive.
- Test adhesion in an inconspicuous spot first.
Timing confuses a lot of people because paint has several stages. Dry-to-touch comes first, then recoat time, then it's safe for tape, and full cure comes last. A common stencil-specialist recommendation is to wait at least 24 hours before putting a stencil over a fresh base coat, but your actual window depends on temperature, humidity, and the product. Follow the paint and adhesive labels rather than one universal schedule. A flat or matte base absorbs stencil paint quickly and reduces seepage, though a higher sheen is more washable for a high-traffic room.
One safety note for older homes: the EPA estimates roughly three-quarters of homes built before 1978 still contain some lead-based paint. Stenciling over intact paint is low-risk, but sanding or scraping old paint disturbs it. Use lead-safe practices if you're prepping an older surface. Cover Pro Painting is EPA Lead-Safe (RRP) Certified, which matters when prep on a pre-1978 wall is part of the job.
Tools, Paint, and a Test Board Before You Start
Gather these first:
- Stencil with registration marks
- Interior water-based acrylic or latex paint (easier to control and lower-emission than oil or spray)
- Dense high-density foam roller
- Stencil brush for details and edges
- Low-tack painter's tape to keep the stencil from shifting
- Optional repositionable spray adhesive (apply lightly, test first, ventilate)
- Level and measuring tape
- Pencil or removable marker
- Paper towels or cardboard for offloading paint
- Drop cloths
- Base-color paint for touch-ups
- A sample board
Then test on the board before you touch the wall. Paint it in your base color, check the contrast and sheen, and practice offloading the roller until it's nearly dry. Run one full pattern repeat, step back across the room, and take a quick look at it in different light. That single step is what separates a clean finish from learning on your actual wall.
How to Stencil a Wall Step by Step
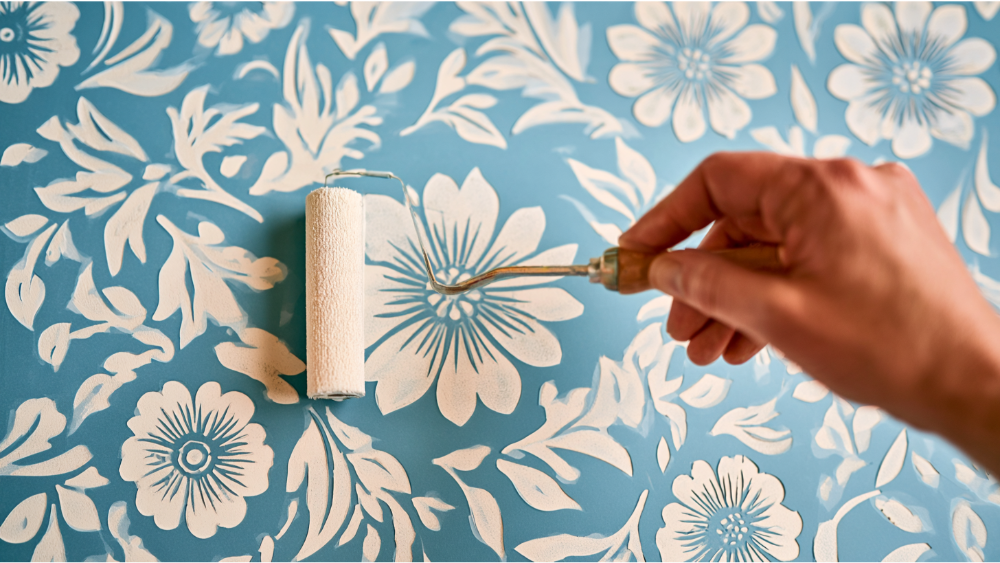
- Protect floors, trim, outlets, and nearby surfaces.
- Establish a level starting line. Don't trust the ceiling or trim to be plumb.
- Position and secure the stencil with low-tack tape, plus a light mist of spray adhesive if needed.
- Load the foam roller or brush, then offload most of the paint onto cardboard or paper towels.
- Apply several light passes with light pressure, keeping the roller or brush nearly dry.
- Lift the stencil while the paint is still wet.
- Check the back of the stencil and wipe off any buildup every few placements.
- Align the registration marks for the next placement.
- Repeat in one consistent direction across the wall.
- Save corners, ceiling lines, trim, and partial repeats for last.
- Touch up small imperfections with your base color.
- Follow the paint label before cleaning or placing anything against the wall.
How to Stop Paint Bleeding Under a Stencil (and Fix Common Mistakes)
Bleed comes from too much paint and too much pressure. To keep edges clean:
- Start with a smooth, clean wall and a fully dry base coat
- Hold the stencil flat against the surface
- Use very little paint
- Choose a dense foam roller or a stencil brush
- Apply light pressure in thin coats
- Remove the stencil while the paint is wet
- Wipe the underside clean between placements
Textured Walls: Wall Painting Stencils vs. Wallpaper

Light texture can take a stencil if you keep your expectations realistic. The texture stays visible and edges won't be razor-sharp. A stencil brush with a gentle pouncing motion is more forgiving than rolling, and organic designs hide small edge variation better than high-contrast geometry. Heavy orange-peel, knockdown, stucco-like, or damaged surfaces are poor candidates for a crisp wallpaper look. Test an inconspicuous area, and know that smoothing or repainting the wall first is sometimes the better call.
Choosing between a stencil, wallpaper, and a solid accent wall is about what you want from the décor. As an affordable alternative to designer wallpaper, wall painting stencils give you custom colors, hand-painted character, easy localized touch-ups, and a reusable template at a fraction of the cost. Wallpaper offers a highly consistent factory print, complex imagery, and real material texture, but it often means professional installation and a bigger commitment. Solid paint is the fastest to apply and the easiest to change later. A hand-stenciled finish has slight natural variation and won't look exactly like printed wallpaper, and for many people that handmade whimsy and personality is the point. In a dining room, a bedroom, or an entry where you want a wow moment, a large stencil is an easy way to create that stunning feature without committing to wallpaper. It's a fun diy project that lets you unleash your own creativity and bring a little life to a tired space.
When to DIY and When to Call a Pro (Edgewood & Greater Seattle-Tacoma)
A small single-color motif is beginner-friendly, and the right online tutorials can walk you through your first one. Bringing in help makes sense when the wall needs substantial prep, the paint is loose, damaged, or glossy, the home may contain lead paint, the design is multi-layer or high-contrast geometric, the project involves high walls or a stairwell, or the whole room needs repainting first. If style questions or budget concerns are on your mind, a professional can help you land in the right place before you start putting anything on the wall.
For homeowners and businesses in Edgewood and the greater Seattle-Tacoma area, we can prep and professionally repaint interior walls, trim, doors, and millwork so you start any decorative treatment from a clean, properly prepared base. Our goal is a result that makes your home look fabulous and leaves your family and friends happy with how it turns out. We're licensed, bonded, and insured in Washington State and EPA Lead-Safe (RRP) Certified, which matters on older homes. First-time customers get 10% off, and 0% APR financing is available. Start with a free estimate and we'll walk the scope with you before any work begins. Call 206-222-0435 or grab your phone and reach out today.
Frequently Asked Questions
Is wall stenciling outdated?
No. It's still a flexible, customizable way to add pattern to a home, and oversized or organic designs read as modern feature walls that capture the essence of your personal style.
How do I use stencils to paint walls?
Prep the wall, level a start line, secure the stencil, offload most of the paint, apply light passes, lift while wet, align the registration marks, and repeat in one direction.
Where can I find large wall stencils for painting?
Home-improvement retailers, dedicated stencil specialists in the décor industry, and online shops carry oversized, mural, and allover designs in reusable Mylar across various sizes. Add the size that fits your wall to the cart and check the repeat before you order. Don't wait to discover how many designs are out there.
What are some easy wall stencils for beginners?
Single-color organic or floral motifs and simple borders are the perfect kind of wall stencils to spruce up a wall, especially on lightly textured walls. They win hearts fast because they're easy to work with.
Should I remove the stencil while the paint is wet?
Yes. Lift it while the paint is still wet so bonded edges don't pull up your design. Giving each placement that small bit of care is what helps you achieve a clean, lasting look.
