



Painting Wood Paneling: A Prep-First Guide to Lasting Results

Key Takeaway
Painting wood paneling is straightforward when the surface is clean, dry, and properly prepped before primer or paint is applied. Start by identifying your paneling material, since solid wood, veneer, and printed laminate each require different prep. Dull glossy surfaces with 220-grit sandpaper or a liquid deglosser, apply a bonding or stain-blocking primer, then apply at least two thin coats of interior paint.
Yes, most wood paneling can be painted, and the result can brighten a room beautifully, but only if the paneling is sound, clean, dry, and properly prepared first. The paint itself is the easy part. The lasting part depends on the proper prep work you do before the brush or roller ever touches the wall: identifying what the paneling is made of, fixing any damage underneath, and dulling slick surfaces so the finish actually grips. Skip that work and you'll likely be looking at peeling paint and bleed-through stains within a couple of years.
This step by step guide is for the homeowner staring at dark, dated, or glossy wood paneling who wants a real change, not a redo. We'll walk through how to identify your paneling, inspect it before you commit, handle lead safety on older homes, decide what to do with the grooves, prep and prime the right way, choose paint and sheen, apply it cleanly, and recognize when the job calls for a pro. Start by diagnosing the wall, not by cracking open a paint can.
Should You Paint Your Paneling, or Preserve, Refinish, or Remove It?
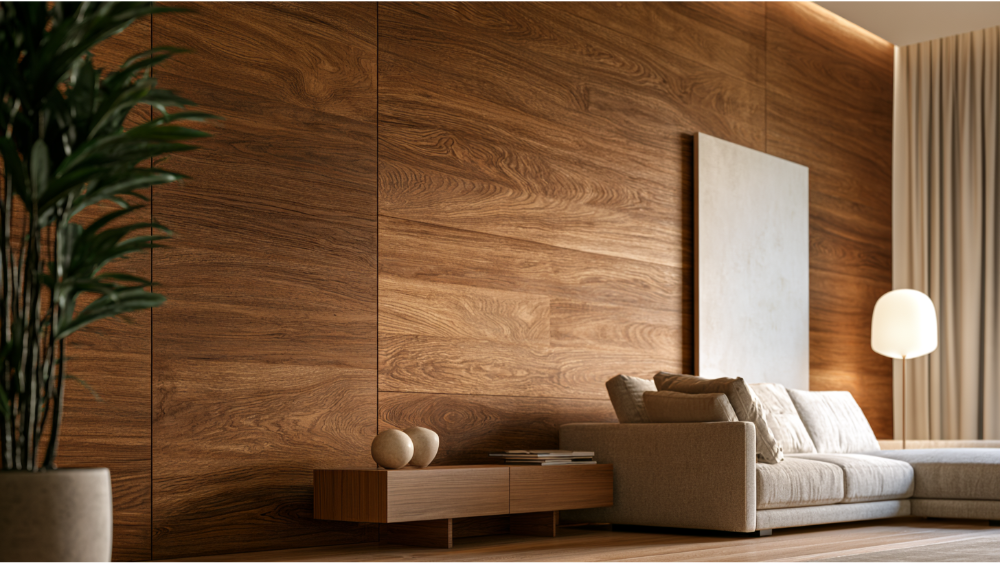
Paint is a cost-effective way to update a space without demolition, and it genuinely transforms paneling that reads as dark, orange-toned, or stuck in another decade. A fresh coat in a light color can make a cramped den feel open and current, and the same move works wonders on paneled walls flanking a dated fireplace or wrapping a basement rec room. For most dated interior paneling, painting is the sensible move, and even one wall can shift the whole style of a space.
But it helps to pause before you commit, because painting is hard to undo. Once quality real wood paneling is painted, getting back to the original grain is a demanding, messy job that rarely looks right. If you have real wood paneling or solid wood paneling in good condition, with character worth keeping, consider cleaning and refinishing or restaining it instead. That path preserves the material and the value it adds to the home.
On the other end, if the panels are failing, warped, water-stained, or coming loose at the seams, no amount of paint will save them. In that case, replacement often makes more sense than dressing up a surface that's on its way out. The honest answer depends on condition and what the paneling is. That's exactly why we identify and inspect before we prep.
Identify What Type of Wood Paneling You Have
"Wood paneling" covers several different materials, and they don't prepare the same way. Treating a printed laminate panel like solid oak is how good intentions turn into ruined walls. Here's what you're likely dealing with:
- Solid wood: real boards, often tongue-and-groove. Grain is continuous and varies naturally from board to board. Knotty pine paneling falls in this group and brings its own stain-blocking needs.
- Wood veneer over a composite core: a thin real-wood layer bonded to particleboard or plywood. Common in mid-century homes.
- Plywood: layered wood sheets, sometimes grooved to mimic plank paneling.
- MDF or fiberboard: dense, smooth, engineered panels with no natural grain on the core.
- Printed laminate or faux wood paneling: a photographic wood-look surface over a composite board. The grain pattern repeats at regular intervals.
Beadboard, wainscoting, and board-and-batten are styles, not materials. Any of them could be solid wood, MDF, or something else underneath. Cedar and knotty pine are two real wood species you'll run into often, and both release resins that call for careful priming.
You can usually tell without damaging anything. Look at an exposed edge near a seam, outlet, or doorway: solid wood shows end grain, while veneer and laminate show a thin surface layer over a different core. If the wood grain pattern repeats identically across several panels, you're almost certainly looking at printed faux wood. The reason this matters: thin veneer and printed surfaces can be ruined by aggressive sanding, and slick factory-coated surfaces need a bonding primer and an adhesion test before you trust them with paint. The same logic applies if you're eyeing other wood surfaces in the room, like kitchen cabinets or a paneled front door, since each needs prep matched to its finish.
Inspect First: When NOT to Paint Paneling Yet
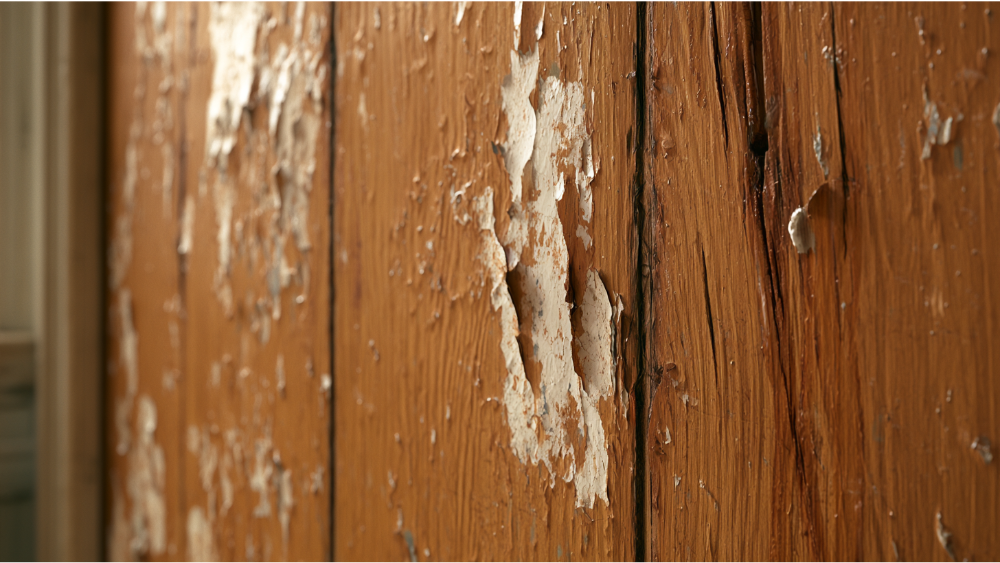
Paint is cosmetic. It cannot fix a structural or moisture problem, and sealing a problem under a fresh finish almost always makes it worse. Before any surface prep, walk the wall and look for these warning signs:
- Active leaks, dampness, or water stains
- A musty odor or visible mold
- Soft, spongy, or crumbling wood
- Warped, bowed, or loose panels
- Bubbling or delaminating veneer
- Severe peeling of an existing coating
- Cracked trim or open, unstable seam
If you find moisture, correct the source first. The EPA recommends drying water-damaged materials within 24 to 48 hours to limit mold growth, and mold has to be cleaned up before painting, because paint applied over a moldy surface is likely to peel. Soft wood, rot, and delamination call for repair or replacement, not a coat of paint over the top.
This is where a full-service team earns its keep. When an inspection turns up rot, damaged trim, or panels that need replacing, having the carpentry, rot repair, and painting handled by the same crew means the underlying problem gets fixed before the finish goes on, and you're not chasing down separate contractors.
Lead Safety: Stop Before Sanding Older Paneling
If your home was built before 1978, pause before you sand or scrape anything. Paint from that era may contain lead, and sanding or scraping old paneling creates fine dust that's hazardous to breathe or leave behind, especially around children.
The EPA's Renovation, Repair, and Painting (RRP) Rule applies to paid work that disturbs painted surfaces in pre-1978 homes. The rule carries a minor-repair threshold of roughly 6 square feet of interior painted surface per room (and about 20 square feet outside), subject to exceptions. A firm you hire for covered work must be RRP certified and follow lead-safe practices.
If you're doing the work yourself, the rule may not require certification, but you should still follow EPA lead-safe DIY guidance: contain the area, control dust, clean up with a HEPA vacuum, and avoid uncontrolled dry sanding. When in doubt, test first or bring in a certified pro.
This is one area where hiring matters. Cover Pro Painting is EPA Lead-Safe (RRP) Certified, which is directly relevant for the many older homes across Edgewood and the greater Seattle-Tacoma area where lead-safe handling isn't optional.
Keep the Grooves or Fill Them for a Smooth Wall?

Paneling grooves give you two honest appearance paths, and each comes with real trade-offs.
Path 1, keep the grooves. This is far less work. You clean, prep, prime, and paint the paneling, and the grooves stay as part of the look. Painted in a modern color, grooved paneling can read as intentional shiplap-style character rather than dated wood. For most homeowners, this is the practical choice.
Path 2, fill the grooves for a smooth look. This means packing the recessed lines with a patching compound, sanding them level, priming, and then painting across the entire wall. It can give you something close to a flat wall of drywall, but be realistic: panels and joints move with temperature and humidity, so filled lines can reappear as hairline cracks over time. This path adds a lot of repair, sanding, and priming work, and it is time consuming.
Know the difference between your two filling materials. Flexible, paintable caulk belongs at moving seams and perimeter gaps where panels meet trim, the ceiling, or each other, because it flexes as things expand and contract. A thin bead of caulk along the top edge where the paneling meets the ceiling also gives you a crisp line to cut to. Patching or spackling compound is for leveling broader recessed areas, and any filled or spackled spot must be spot-primed before the finish coat so it doesn't flash or soak up paint unevenly.
How to Prepare Wood Paneling for Paint: The Key Steps
Prep work is where a paint job is won or lost. Glossy surfaces that aren't dulled won't hold paint, and fragile veneer that's sanded too hard gets wrecked. The goal is a clean, sound, lightly roughened surface that gives primer something to grab. If you take one idea from this guide, it's this: prepare the surface properly and the finish takes care of itself. Here are the key steps in sequence:
- Protect the room. Cover the floor, furniture, and fixtures. Mask trim, and remove outlet covers, switch plates, and hardware where you can.
- Clean thoroughly. Wipe the paneling down with a degreasing cleaner to strip years of built-up grease, wax, furniture polish, and dust. This step alone saves a lot of adhesion problems, and it matters most on old paneling in kitchens and dens where decades of film have built up.
- Let it dry completely. Primer and paint need a dry surface to bond.
- Repair first. Fill holes, address damaged seams, caulk the gaps, and secure any loose or unstable areas before you go further.
- Dull glossy surfaces. Give the surface a light sanding with a fine paper (around 220 grit) to create tooth for the primer. Light is the key word: you want to knock down the sheen, not cut through thin veneer. For fragile or printed faux surfaces, a liquid sandpaper or deglosser is a gentler alternative.
- Remove all sanding dust. Vacuum, then wipe with a tack cloth. Paint over dust and it won't stick.
- Tape the edges. Run painter's tape along trim, the ceiling, and anywhere you want a clean line.
- Test before you commit. Prime a small, inconspicuous area and let it cure, then check adhesion. If it bonds well, you're clear to proceed.
Good tools help here: a degreaser, fine sandpaper, a quality brush, a roller, painter's tape, and the right primer are the core kit. That test step is the practical answer to the whole "do I need to sand?" debate. Glossy surfaces have to be dulled or the finish won't last, and aggressive sanding can destroy veneer, so a small primer test tells you what the wall will actually tolerate.
Choosing the Best Primer: Oil Based, Water Based, or Both?
When you apply primer to paneling it does one or both of two very different jobs, and understanding which you need keeps you from choosing the wrong product.
Adhesion. A bonding primer is built to grip hard, slick, or factory-finished surfaces that regular paint would slide off of. If your paneling has a glossy or laminate finish, adhesion is your main concern, and a high-adhesion bonding primer is essential. This is also the best primer choice when you're painting slick kitchen cabinets or a previously varnished front door.
Stain blocking. Wood releases tannins, and knots, sap, and old water stains can all bleed through standard latex paint, leaving yellow or brown blotches, especially under lighter colors and under white paint in particular. A stain-blocking primer seals those extractives so they stay put. This is a separate problem from adhesion, and a slick-but-clean surface may need adhesion help while a knotty wood surface needs stain blocking.
Many paneling jobs need both, and plenty of quality primers combine bonding and stain-blocking properties. Oil based primer and water based primer each have their place: an oil based primer is a strong stain blocker that locks down stubborn tannin and water marks, while a modern water based primer cleans up easily and performs well on slick surfaces. Whatever you choose, spot-prime every repaired or spackled area, and plan on a second coat of primer for even coverage over dark wood paneling. We don't name brands here on purpose; the right pick depends on your specific surface and finish coat.
Choosing Paint and Sheen for Paneled Walls
Use a quality interior paint suited to the room and the substrate, and let how the space gets used guide your sheen.
Lower sheens like matte and eggshell hide imperfections and soften the look of groove lines, which is helpful on textured paneling. Higher sheens like satin and semi-gloss are more washable and scuff-resistant, making them a good pick for trim and high-touch surfaces. In kitchens, hallways, and busy family rooms, that washability earns its keep. A soft white paint color reads clean and current on paneled walls, though it demands careful stain blocking underneath so nothing bleeds through.
Ventilation matters more than people expect. The EPA notes that several organic pollutants average 2 to 5 times higher indoors than outdoors, with sharp spikes during painting. Low-VOC, family-safe products reduce that load and are widely available, but they don't eliminate the need for fresh air: open windows, run fans, and follow the label.
Going from dark paneling to a light, modern color takes planning, because dark surfaces need good coverage to avoid shadowing through. A free color consultation helps you pick a different color and coating system that actually covers, so you're not surprised three coats in.
How to Paint the Paneling: Grooves, Flat Areas, and a Second Coat

Technique keeps the finish clean and even. Don't paint directly over dust or a glossy groove you missed; the sequence below keeps you ahead of those traps. Work in this order when applying paint:
- Cut in first. Use a quality synthetic brush to paint the grooves, corners, and edges before you roll. This catches the recessed lines a roller skips and prevents lap marks.
- Watch the grooves. Paint pools and drips in recessed lines. Back-brush to clear any excess so it dries smooth instead of sagging.
- Roll the flat sections. Once the grooves are brushed, load a roller with a nap suited to the texture and roll the broad areas while the cut-in edges are still workable to keep a wet edge and avoid seams.
- Go thin, not thick. Several thin, even coats cure smoother and resist runs far better than one heavy pass.
- Sand lightly between coats. For the smoothest final look, give dried coats a light scuff and remove the dust before recoating.
Expect at least two coats, sometimes more, for even coverage over dark paneling. There's no universal drying or recoat number, so follow the product label's specific times. Before you call it done, check the rest of the wall from several angles under good light to catch thin spots and missed grooves.
Common Paneling Paint Failures and Why They Happen
Most problems trace back to prep. This table covers what goes wrong and why:
Give fresh paint time to cure before heavy use or hanging decor, roughly 24 hours to handle gently and longer to fully harden, following the label. Nearly all of these failures are preventable with proper cleaning, deglossing, and priming.
DIY or Hire a Pro? When Painting Wood Needs a Full-Service Team

A sound, simple paneled wall in a newer home can be a manageable weekend project if you respect the prep. Bring in a professional when the job involves any of these:
- Pre-1978 coatings that need lead-safe handling
- Extensive sanding or repairs
- Rot, water damage, or panel replacement
- A full smooth-wall conversion
- Large areas of deeply grooved paneling
- High or hard-to-reach walls, or paneling that runs up to a tall ceiling
- Spraying in an occupied home
- Previous coatings that have already failed
Full-service capability matters most when an inspection turns up more than paint. Rot repair, carpentry, panel replacement, and painting can be scoped together so the underlying problem gets corrected before the finish goes on, handled by one team instead of several contractors you have to coordinate. The same crew that paints the paneling can refinish a worn front door or tired kitchen cabinets in the same visit, so the whole space comes together at once.
That's the work we do. Cover Pro Painting, founded by Alex, has served Edgewood and the greater Seattle-Tacoma area for over 13 years. We're licensed, bonded, and insured in Washington State, EPA Lead-Safe (RRP) Certified, and we back our exterior work with a five-year warranty and our products with lifetime manufacturer warranties. Every estimate is free, includes a color consultation, and comes with clear communication from start to finish, plus 10% off for first-time customers. Ready to see what your project involves? Get your free painting estimate by calling 206-222-0435.
Frequently Asked Questions
Can I just paint directly over wood paneling?
Not without prep. You can paint over wood paneling, but only after cleaning off grease and wax, dulling any gloss, repairing damage, caulking the gaps, and priming with the right primer. Rolling paint straight onto an untouched glossy surface is the fastest route to peeling, so the preparation is what makes it last.
Is painting wood paneling a good idea?
Yes, for a dated room with glossy or dark wood in sound condition it's a cost-effective way to modernize without demolition. Reconsider if you have valuable solid wood worth preserving, since painting is hard to reverse, or if the panels are failing, in which case repair or replacement should come first.
What kind of paint can I use on wood paneling?
A quality interior paint applied over the right primer. Pick sheen by use: lower sheens like eggshell hide groove lines, while satin or semi-gloss is more washable for trim and high-touch areas. Low-VOC, family-safe options are widely available, but ventilate the space regardless of what you choose.
Do I need oil based primer or water based primer on paneling?
It depends on the problem you're solving. An oil based primer is the strongest choice for blocking stubborn tannins and old water stains so they don't bleed through, especially under white paint. A water based primer cleans up easily and bonds well to slick, factory-finished paneling. Many jobs call for a bonding, stain-blocking primer that handles both, which is often the best primer for old paneling with knots and a glossy sheen.
What happens if you don't sand paneling before painting?
Glossy, un-dulled surfaces don't give paint enough tooth to grip, so the finish can peel or scratch off not long after it dries. A light sanding with about 220-grit paper, or a liquid deglosser on fragile surfaces, combined with a bonding primer, solves this and sets up a finish that stays put.
