%201.svg)


How Much Prep Is Really Needed Before Exterior Painting?

Here’s a quick answer: how much prep is really needed before exterior painting depends on the condition of the home’s exterior, but for a good paint job, prep usually takes more time than the actual painting. Cleaning, scraping, sanding, repairs, priming, and waiting for surfaces to dry are what allow new paint to adhere and last. Skipping prep almost always leads to peeling paint, wasted money, and repainting far sooner than expected.
Why Exterior Paint Prep Matters More Than the Paint Itself

A long lasting exterior paint job is not defined by brand or color. It is defined by prep. Exterior paint needs a clean, dry, stable surface to bond to. When prep is rushed, paint sits on top instead of bonding into the surface. Over time, moisture works its way behind the coating and causes failure. In the Pacific Northwest, this is especially common because homes are exposed to rain, damp air, and shaded areas that dry slowly. A good paint job protects the house, but only if prep work is done correctly from the start.
What “Proper Exterior Paint Prep” Actually Means (Not the Shortcut Version)
Step 1: Washing the Home the Right Way
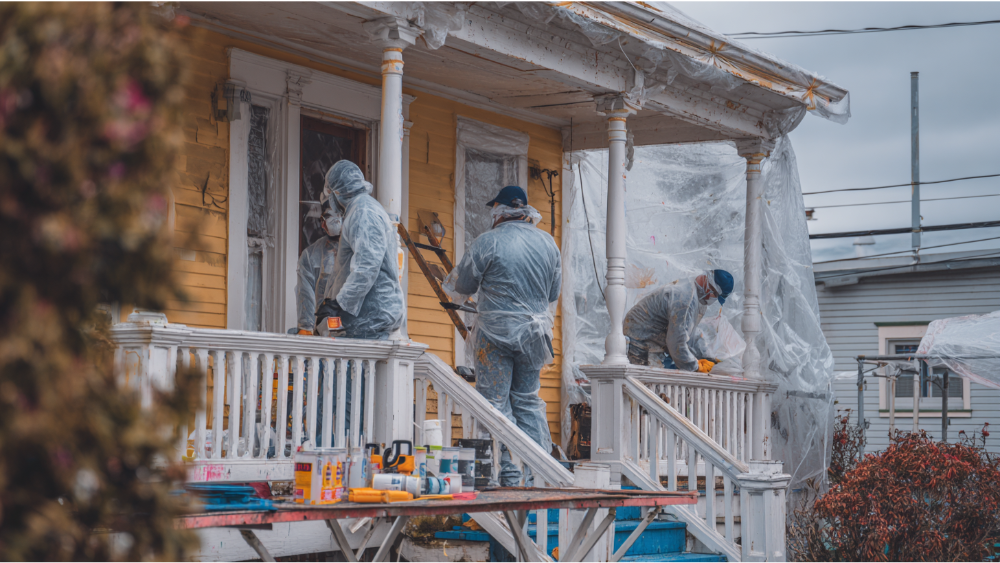
Every painting project should begin with cleaning. Dirt, mildew, mold, pollen, and chalky residue from existing paint all prevent adhesion. Most professional crews pressure wash the home’s exterior, but pressure alone is not enough. The goal is to clean, not damage the surface. A pressure washer or power washer is used carefully, often with cleaning solutions, to remove buildup without gouging wood or siding. Pressure wash steps also include protecting landscaping and covering nearby areas with plastic to catch paint chips and debris later in the process.
Step 2: Letting the House Fully Dry
After washing, the surface must dry completely. This step requires patience. Painting too soon traps moisture beneath the coating, which leads to peeling paint and bubbling. In Western Washington, it is common to wait two to three days after washing. Shaded siding, north facing walls, and areas near landscaping often take longer. Most painters who rush this step are setting the job up for failure.
Scraping and Sanding: How Much Is Enough?

Why Loose Paint Must Be Removed
Loose paint is already detached from the surface. Painting over it does nothing to strengthen adhesion. All loose paint must be removed, not just the pieces that are easy to reach. Professionals scrape until they reach sound edges where existing paint is firmly attached. The goal is not to remove all the paint on the house, but to remove loose paint so new paint has a stable base. When painters fail to remove loose paint, it continues to peel underneath the fresh coat.
Feather Sanding and Surface Smoothing
After scraping, the edges need to be smoothed. To feather sand means blending the scraped edges into the surrounding surface so they are not visible after painting. Sanding also roughens glossy surfaces, which improves adhesion. Sanding creates dust, so nearby areas are often covered and cleaned regularly. This step is essential for a smooth, professional finish.
Repairs Are Not Optional Prep
Caulking Gaps, Cracks, and Failed Seams
Caulk seals joints where water enters. Over time, caulk dries out, shrinks, and cracks. Painting over failed caulk does not stop moisture. Old caulk must be removed and replaced. Common areas include trim, windows, doors, siding joints, and small cracks in the home’s exterior. Proper caulk work keeps water out and helps seal the structure before painting begins.
Rot Repair and Damaged Wood
Paint cannot fix damaged wood. Soft spots, holes, and deteriorated trim must be repaired or replaced. Painting over rot traps moisture and speeds up decay. Prep includes addressing damaged areas so the surface is solid. This protects the house and ensures the paint job lasts.
When and Where Primer Is Required
Bare Wood and Repairs
Any bare wood must be primed. Primer seals the surface and prevents uneven absorption. Without primer, bare wood pulls moisture from the paint and causes early failure. Repairs, patched holes, and sanded areas also require primer to create a uniform surface.
Specialty Primers and Bonding Primer
Some surfaces need more than standard primer. Bonding primer is used when adhesion is a concern. Stain blocking primer may be required on areas with tannin bleed or water stains. Primer is not optional prep, it is part of the system that allows two coats of finish paint to perform properly.
Older Homes and Lead Safety
Homes Built Before 1978
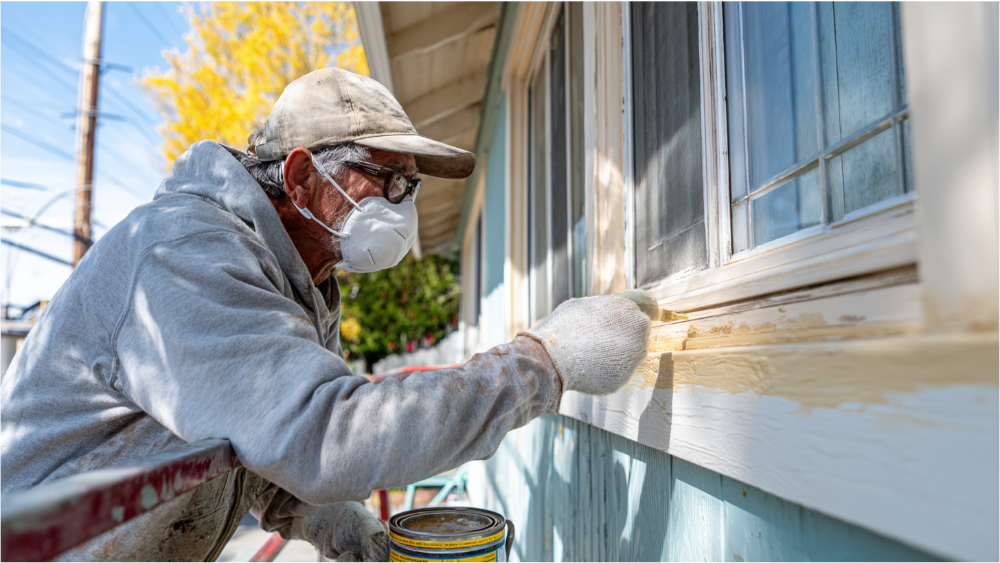
Older homes may contain lead paint or lead based paint. Scraping and sanding these surfaces requires special care. Disturbing lead creates hazardous dust and paint chips. Responsible prep includes containing debris, catching paint chips, and protecting soil, landscaping, and people nearby.
How Lead Affects Prep Time
Lead safe practices add steps to the process. More setup, careful scraping, and thorough cleanup are required. This increases prep time but protects health and the environment. Any painting contractor working on older homes should plan for this from the start.
How Weather and Climate Affect Prep
Moisture, temperature, and shade all influence prep. Rain delays washing and drying. Cool temperatures slow curing. Humidity affects how surfaces dry. Planning around weather is part of professional prep. Rushing painting during poor conditions leads to failure, even with high quality exterior paint.
How Much Prep Time Is Normal?
Realistic Time Breakdown
For many projects, prep accounts for more than half of the total job time. Washing, waiting, scraping, sanding, caulking, repairs, and priming all happen before the first finish coat is applied. A house with peeling paint, damaged siding, or lots of wood trim will require more prep than a well maintained home.
Why Fast Jobs Are a Red Flag
A paint job completed too quickly usually means prep was skipped. One pass with a sprayer does not equal quality. A durable finish requires prep, primer, and multiple coats applied to a clean surface.
How Prep Impacts Cost
Prep work is labor intensive. It does not always stand out visually once the project is complete, but it determines how long the paint lasts. Lower bids often reduce prep, which saves money upfront but leads to repainting sooner. Paying for proper prep protects your investment.
How to Tell If Prep Is Being Done Right
Questions to Ask
Ask how the home will be pressure washed. Ask how long the crew will wait before painting. Ask how loose paint will be handled and where primer will be applied. Clear answers are a sign of experience.
What Should Be in the Estimate
A detailed estimate should outline prep steps, including scraping, sanding, caulking, priming, and protection of landscaping. When prep is clearly defined, expectations are clear.
What Happens When Prep Is Skipped
Skipping prep leads to peeling paint, trapped moisture, mold growth, and premature failure. Existing paint continues to loosen beneath the fresh coat. The result is a mess, wasted money, and repainting far sooner than planned.
What Proper Prep Looks Like

Proper exterior paint prep includes cleaning, waiting, scraping, sanding, repairing, priming, and planning. Each step supports the next. When prep is done correctly, new paint adheres better, seals the surface, and protects the house for years.
FAQs: Exterior Painting Prep
Can you paint without pressure washing?
You can, but dirt, mildew, and debris will reduce adhesion and shorten the life of the paint.
How long should you wait after rain?
Surfaces must be dry. Waiting one to three days is common, depending on conditions.
Does every home need scraping?
Only areas with loose or failing paint need to be scraped, but those areas must be addressed fully.
Is primer always needed?
Primer is required on bare wood, repairs, and many problem surfaces.
How long should exterior paint last?
With proper prep, quality materials, and two coats, exterior paint can last many years.
Final Thoughts
Prep is where quality begins. Understanding how much prep is really needed before exterior painting helps homeowners make better decisions. A well planned process protects the home’s exterior, improves adhesion, and results in a durable finish that looks good and lasts.