%201.svg)


Unlock Curb Appeal: How to Master Front Door Painting
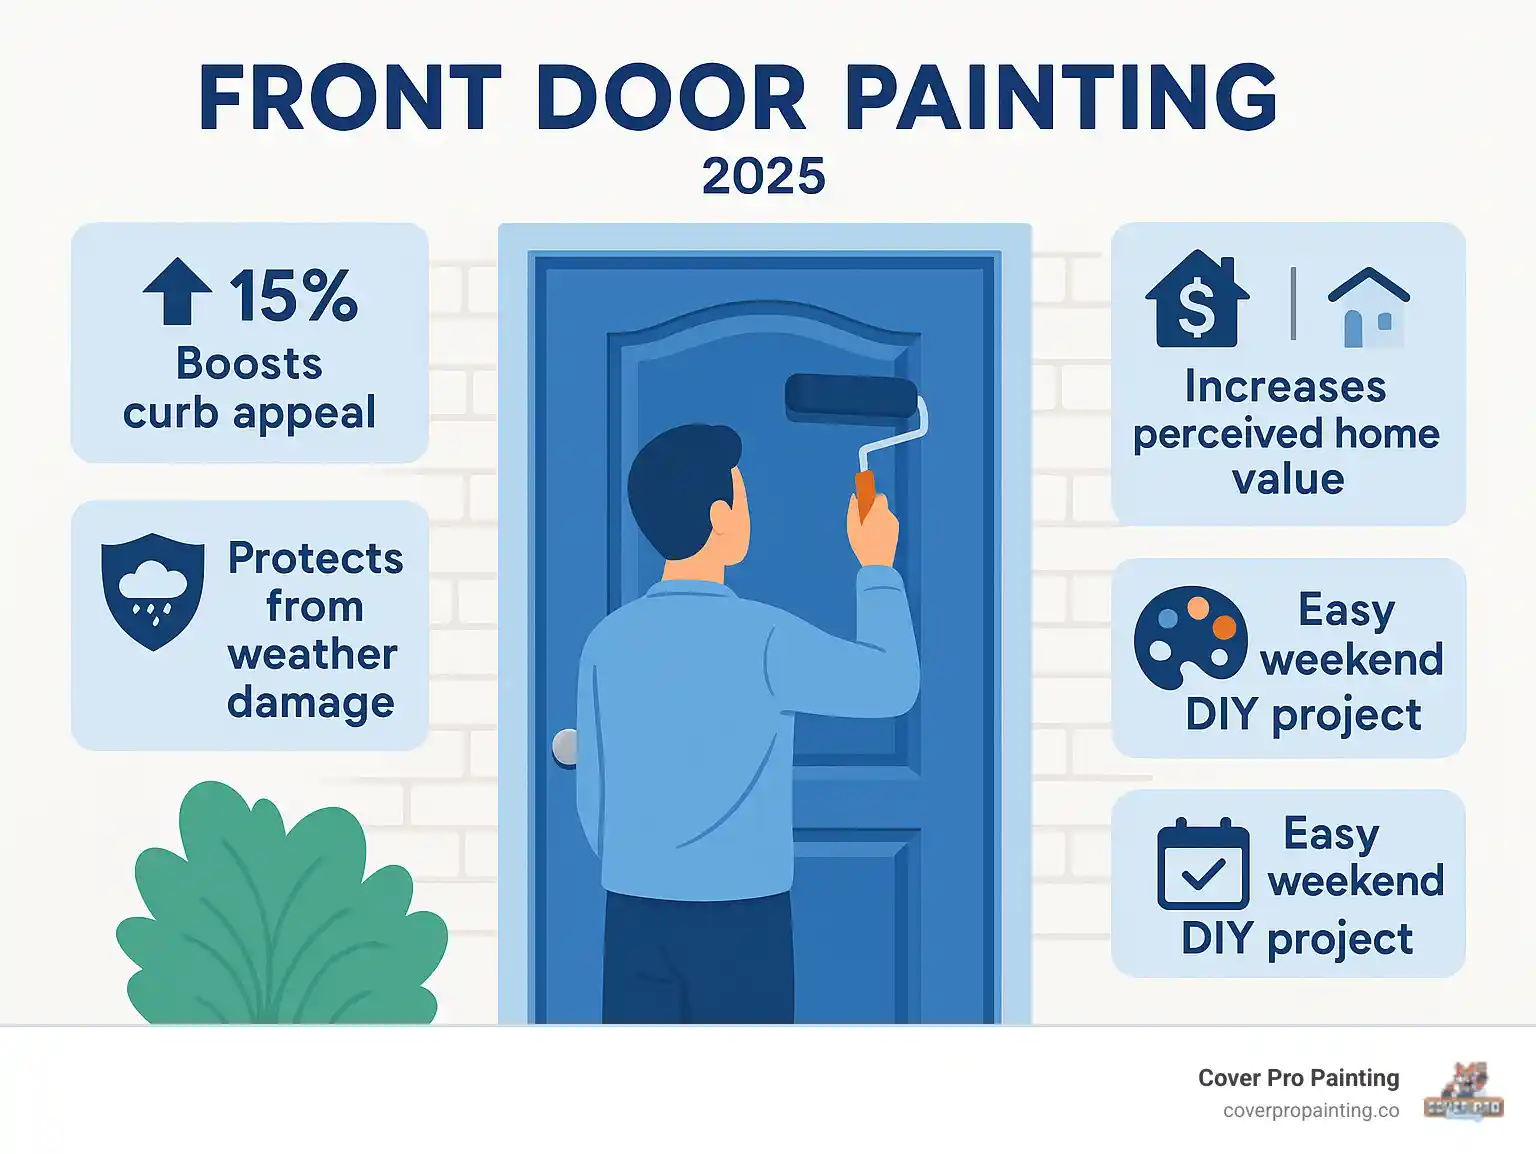
Why Front Door Painting Is Your Home's Best First Impression
Front door painting is a fast, affordable way to boost your home's curb appeal and create a welcoming entrance. As the focal point of your home's exterior, the front door sets the tone for your entire property and can increase its perceived value for visitors and potential buyers.
Achieving a professional, durable finish requires the right preparation, materials, and technique. Here's a quick overview:
- Choose the right paint: Use an exterior-grade latex or oil-based paint in a semi-gloss or high-gloss finish.
- Gather essential tools: You'll need sandpaper, brushes, rollers, primer, painter's tape, and drop cloths.
- Prep thoroughly: A lasting finish depends on a clean, sanded, and primed surface.
- Paint strategically: For paneled doors, paint in a specific order: panels, then rails, then stiles.
- Apply thin coats: Two thin coats provide better, smoother coverage than one thick coat.
- Allow proper drying: Wait at least 24 hours between coats and before reattaching hardware.
This guide will walk you through every step, from selecting the perfect color to applying the final coat like a pro.
Choosing the Perfect Paint and Color
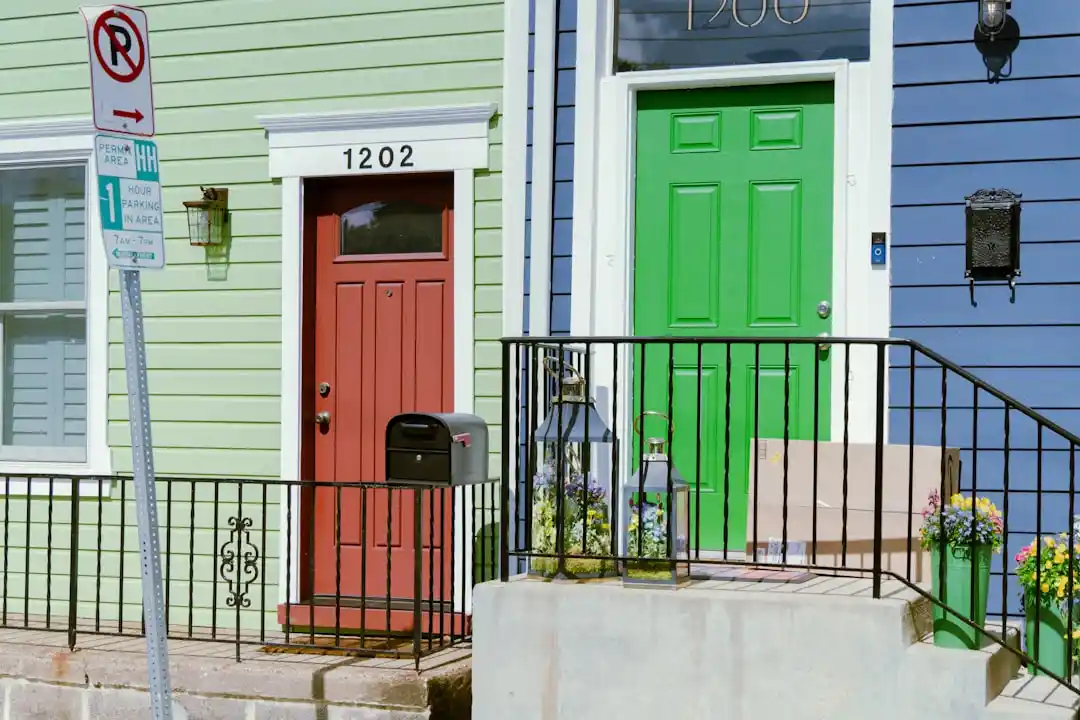
Picking the right paint and color for your front door painting project is crucial, as it's often the first thing visitors notice. The color you choose can make your house feel welcoming, sophisticated, or playful.
Selecting the Best Paint Colors for a Front Door
When selecting a color, consider your home's exterior as a complete palette. The siding, trim, and door should work together harmoniously.
- Classic neutrals like soft grays, warm taupes, crisp whites, and timeless blacks are always in style. They complement almost any exterior and look polished, especially if you have colorful landscaping or unique architectural details to highlight.
- Bold statement colors like deep navy, cheerful yellow, or rich forest green can transform your home's personality and make it stand out on the block.
Pro Tip: Always test paint samples. Paint large swatches on poster board and tape them to your door. Observe them in morning light, afternoon sun, and evening shade, as colors can look different depending on the lighting.
For a pleasing look, aim for contrast rather than a perfect match. A darker door can add depth to a home with light siding, while a lighter door can brighten a darker exterior. Consider your trim color as well. Painting the door frame the same color as the door creates a cohesive look, while a contrasting trim color makes the door pop.
What Type of Paint Should Be Used for a Front Door?
Your front door is exposed to rain, sun, and temperature changes, so you need a paint that's up to the challenge. Always use exterior-grade paint, which is formulated for weather resistance and durability. It contains UV protection to prevent fading and binders that allow it to flex with temperature shifts.
You'll choose between latex (water-based) paint and oil-based paint.
FeatureLatex PaintOil-Based PaintDurabilityFlexible and resists crackingHard finish but can become brittleEase of CleanupWater cleanupNeeds mineral spirits or thinnerDry TimeDries fasterSlower dryingFlexibilityGreat for temperature changesLess forgiving with expansion/contraction
For most DIY front door painting projects, high-quality latex paint is recommended. It's user-friendly, cleans up easily, and handles changing weather well.
Your door material also matters. Wood doors need a paint that can breathe, while metal doors require paint that bonds well and resists rust. Fiberglass doors are versatile and work well with most exterior paints. If your door was previously painted with oil-based paint and you're switching to latex, you must use a bonding primer first. To check, rub a small area with alcohol; if paint comes off, it's latex.
Finding the Right Paint Finish
The paint finish affects both the look and durability of your door.
- Satin finish offers a soft, subtle glow that hides minor imperfections well. However, it's less durable and harder to clean than glossier options.
- Semi-gloss finish is the most popular choice for front doors. It provides a polished look, is tough, and is easy to wipe clean—ideal for a high-touch surface.
- High-gloss finish is the most durable and easiest to clean, offering a luxurious, mirror-like shine. However, it highlights every imperfection, so your prep work must be flawless.
For most homeowners, semi-gloss provides the best balance of beauty, durability, and practicality for a professional-looking finish.
Essential Tools and Preparation for Front Door Painting
Proper preparation is the most critical step for a professional-looking finish that lasts.
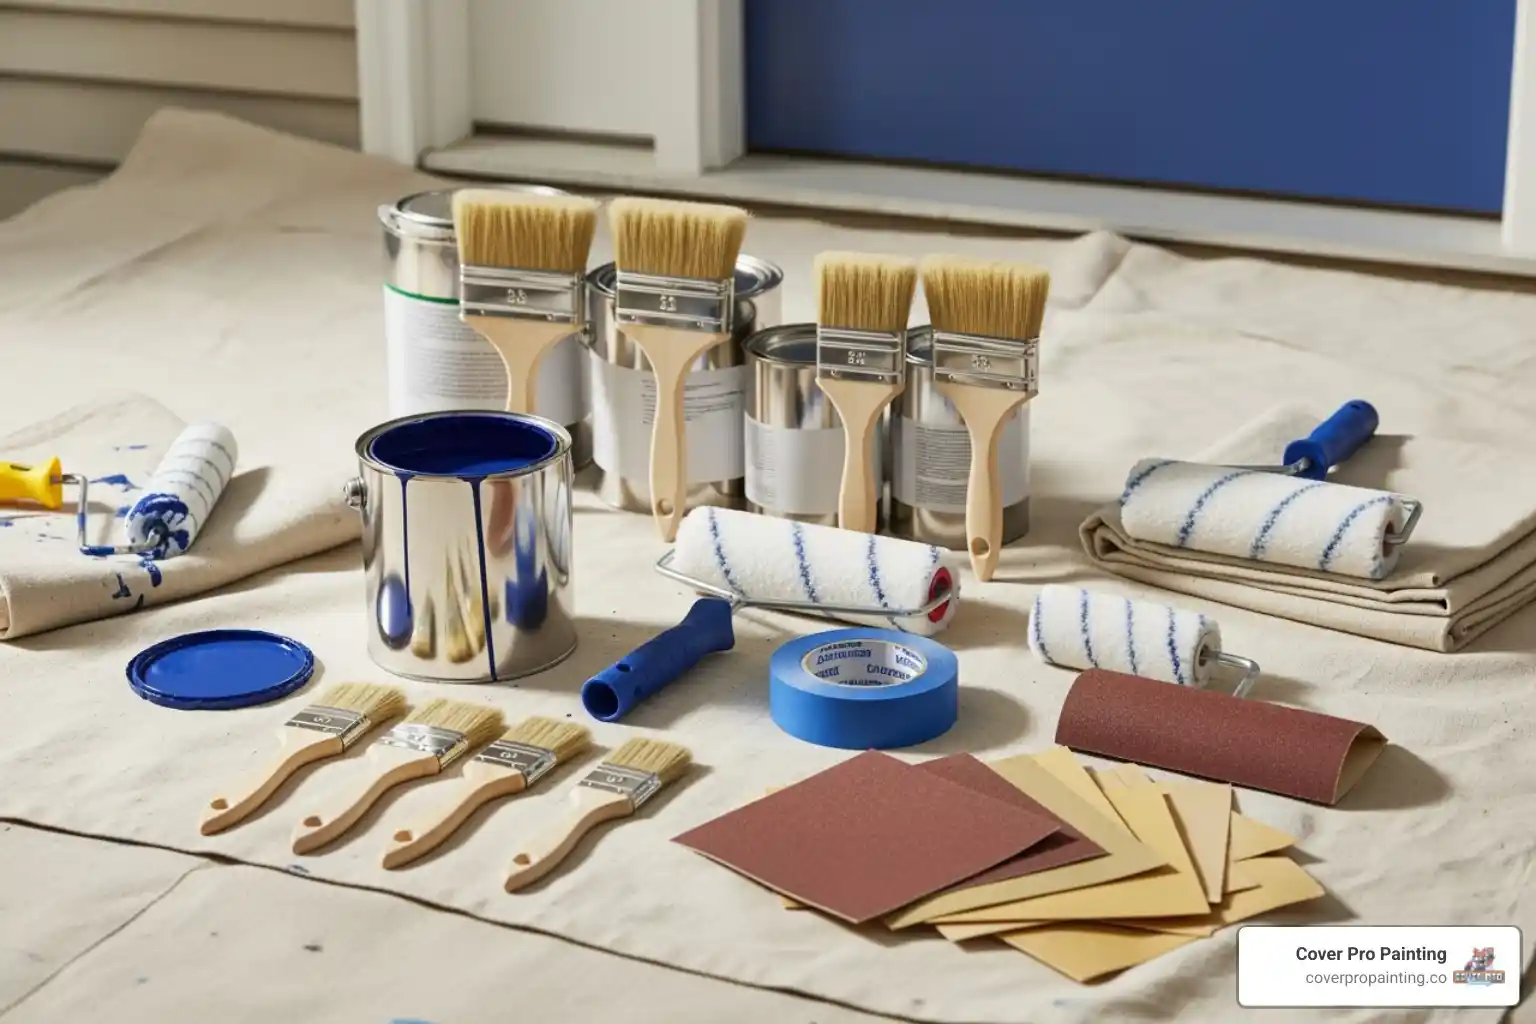
Gathering Your Tools and Materials
Having all your supplies ready before you start will make the front door painting process much smoother. Here's what you'll need:
- Sandpaper: Medium-grit (120) for initial sanding and fine-grit (220 or 320) for a smooth finish.
- Cleaning Supplies: A good degreaser or mild detergent and water.
- Painter's Tape: High-quality tape for clean lines.
- Drop Cloths: To protect your floors and surrounding area.
- Wood Filler: To fill any holes or cracks.
- Tack Cloth: For wiping away all dust after sanding.
- Primer: An exterior-grade primer suitable for your door material.
- Paint: Quality exterior paint in your chosen color and finish.
- Applicators: A 2-inch or 2.5-inch angled paintbrush and a mini foam roller.
- Other Supplies: Screwdriver, paint tray, stir stick, and safety gear (dust mask, eye protection).
How to Prepare a Front Door for Painting
Preparation is about 80% of the work and is what separates an amateur paint job from a professional one. For the best results, take the door off its hinges and place it on sawhorses.
- Remove Hardware: Unscrew doorknobs, knockers, mail slots, and hinges. Keep all screws and parts in a labeled bag.
- Clean the Door: Scrub the entire door with a degreaser or detergent to remove dirt and grime. Rinse thoroughly with clean water and let it dry completely.
- Repair Imperfections: Scrape away any peeling paint. Use wood filler to fill any holes or cracks, smoothing it flush with the surface. Let the filler dry completely.
- Sand the Surface: Start with medium-grit sandpaper to smooth rough areas, then switch to fine-grit sandpaper for a silky finish. Sand the entire door, including the edges. If you find wood rot, it must be properly repaired before painting.
- Remove Dust: Vacuum the door to remove the bulk of the sanding dust, then wipe down every surface with a tack cloth. This step is critical for a smooth paint job.
- Protect Surroundings: Use painter's tape to mask off any glass panes or hardware you couldn't remove. Lay down drop cloths to protect the floor.
Safety Note: If your home was built before 1978, the old paint may contain lead. Wear a NIOSH-approved respirator when sanding, use a HEPA vacuum for cleanup, and follow local guidelines for disposal.
The Step-by-Step Guide to Painting Your Front Door
Follow these steps for a smooth, streak-free finish that will transform your entryway.
Applying Primer for a Flawless Base
Primer ensures your paint adheres properly and the color looks its best. You should always use a primer on bare wood, when making a drastic color change (e.g., dark to light), or to cover stained surfaces. If you are switching from oil-based paint to latex, a bonding primer is essential.
When applying primer, aim for a thin, even coat. Use a brush for detailed areas and a mini roller for larger flat surfaces. Let the primer dry for the manufacturer-recommended time, typically up to 24 hours, before painting. This ensures it has fully cured and provides a perfect foundation for your topcoat.
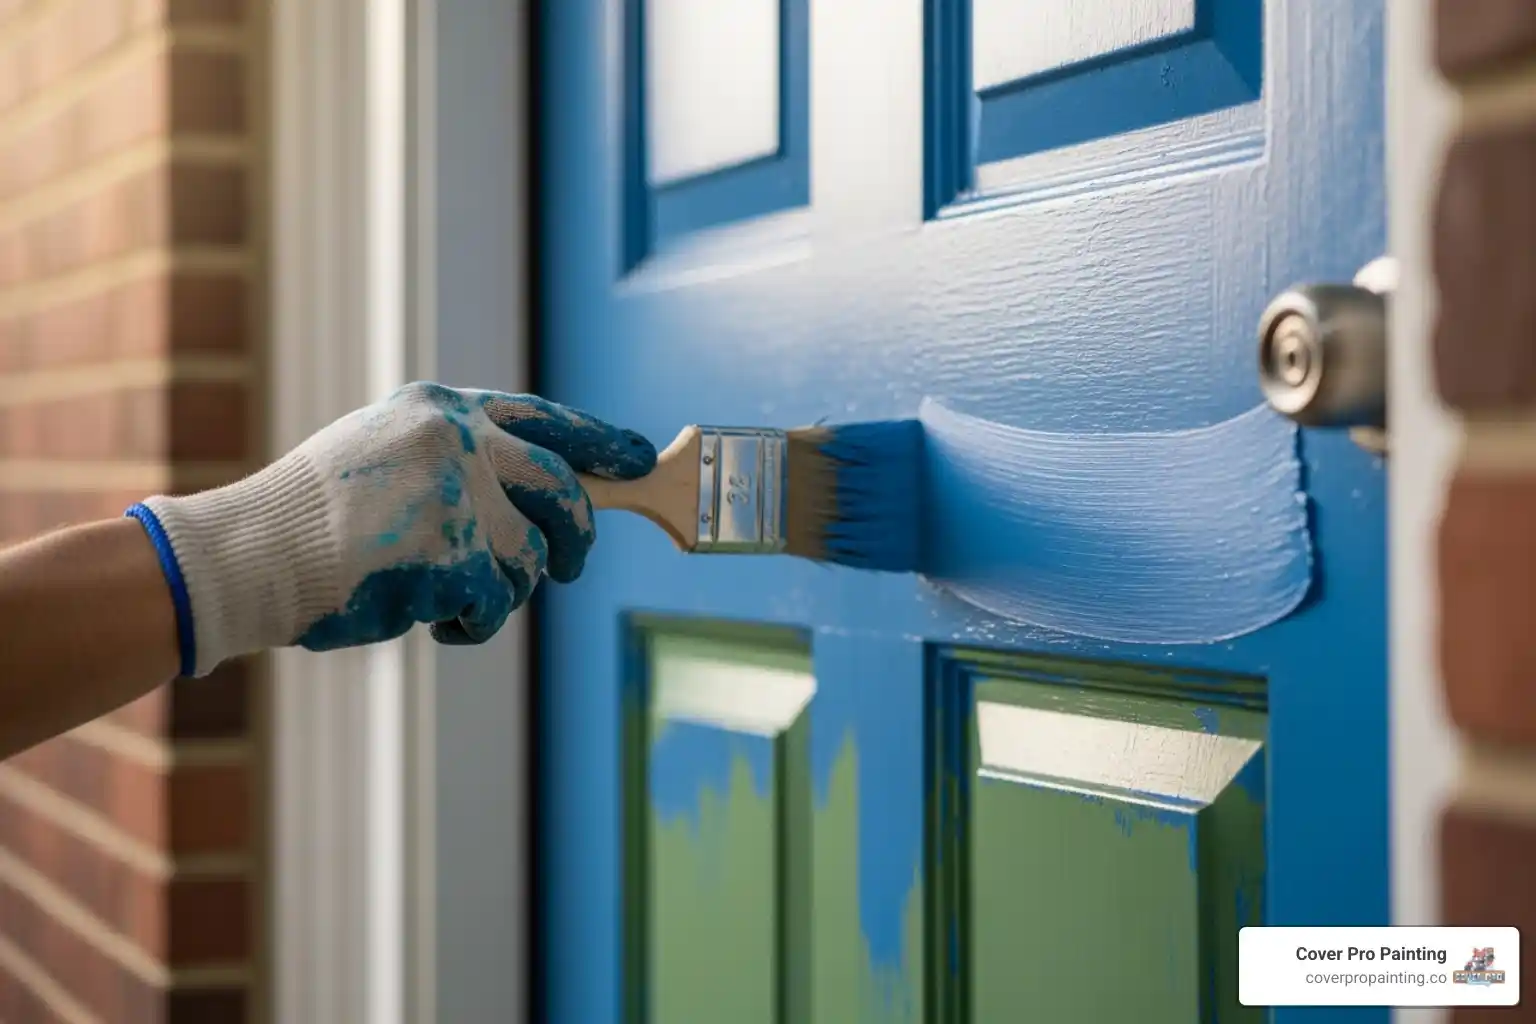
The Proper Technique for Flawless Front Door Painting
With your door prepped and primed, it's time to paint. For the best results and to avoid drips, paint the door while it's horizontal on sawhorses.
For paneled doors, follow a specific order to ensure a smooth finish:
- Door Edges: Paint the edges of the door first.
- Recessed Panels: Use your angled brush to paint the inner moldings of the panels, then fill in the flat center area.
- Horizontal Rails: Paint the horizontal sections, starting from the top and working your way down.
- Vertical Stiles: Finish by painting the vertical sections, starting with the center stile and then the outer ones.
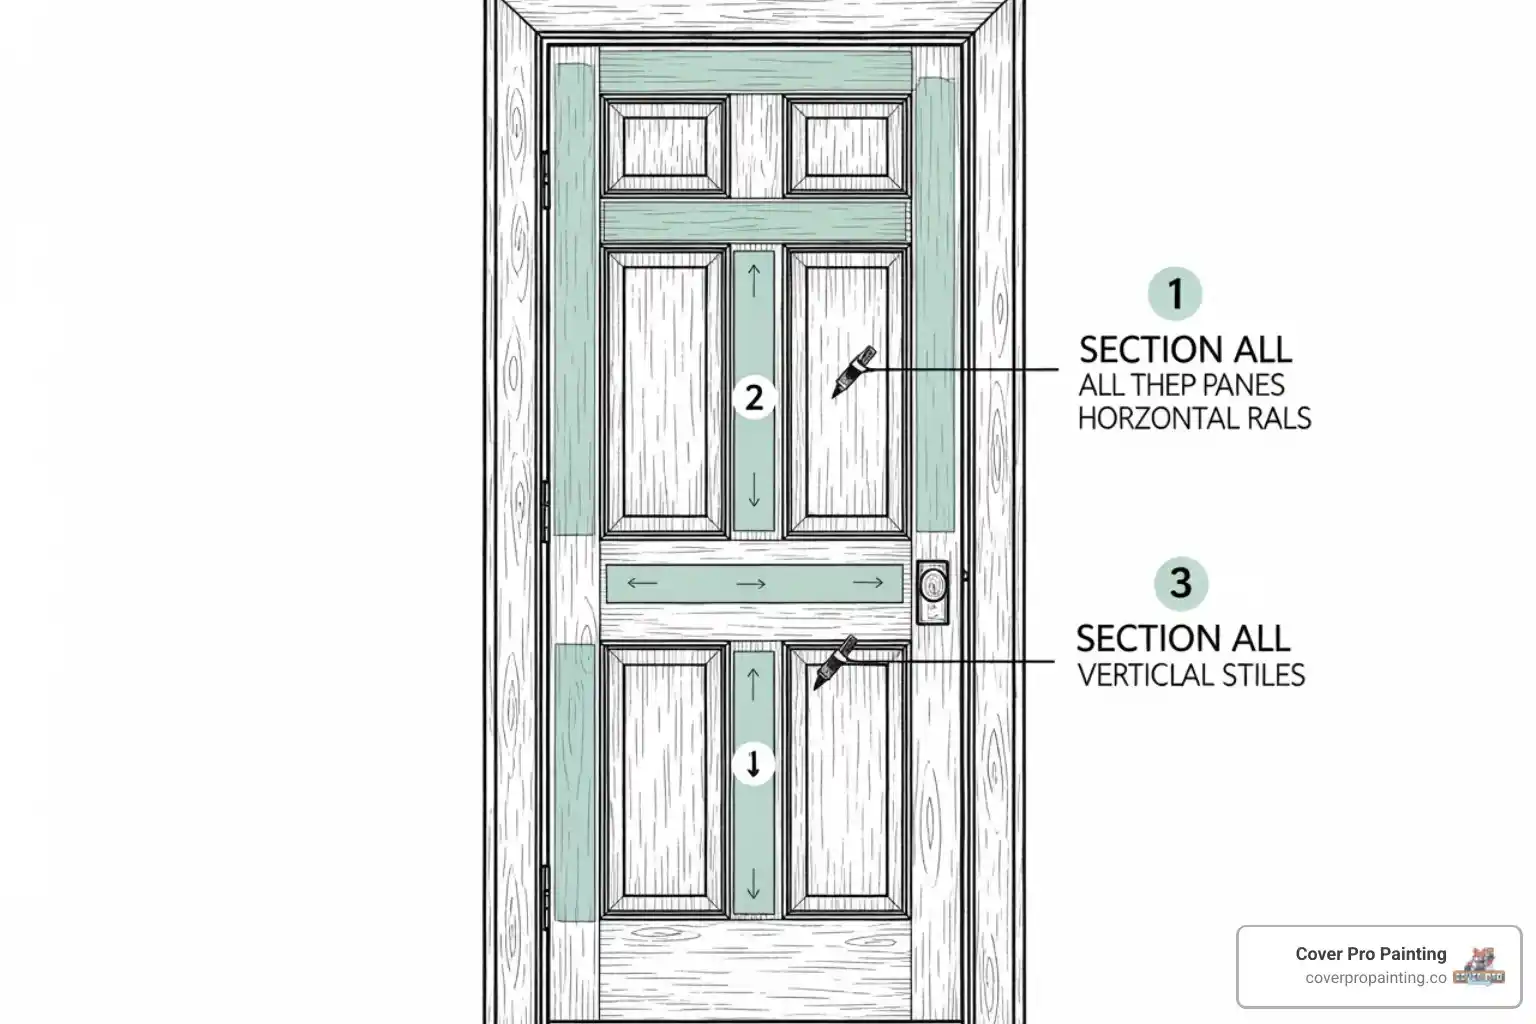
Use your angled paintbrush for details and your mini foam roller for flat surfaces, lightly brushing over rolled areas to smooth the texture. To avoid streaks, always maintain a wet edge, painting into the previously painted section while it's still wet. To prevent drips and runs, apply two or three thin coats rather than one thick one. If you see a drip, brush it out immediately.
Drying, Curing, and Applying a Second Coat
Patience during the drying process is crucial for a durable finish.
- Thin Coats are Key: Most doors need two thin coats for optimal coverage and durability. Dark or vibrant colors may require a third.
- Drying Time Between Coats: Wait at least 24 hours between coats. This allows the first coat to set properly so it won't be disturbed by the second application.
- Curing Time: While paint may feel dry in a few hours, it takes several days or even weeks to cure (reach maximum hardness). You can carefully reattach hardware after 24-48 hours, but avoid heavy use or cleaning until the paint has fully cured.
- Weather Conditions: The ideal temperature for painting is between 55-75°F. Avoid painting in extreme heat, cold, or direct sunlight, as this can cause the paint to dry too quickly and leave brush marks. High humidity will significantly slow drying times, so aim for a day with low humidity.
Common Questions and Maintenance Tips
Keep your front door looking its best and troubleshoot common issues with these expert tips.
Can You Paint a Front Door Without Removing It?
Yes, you can paint your door while it's on its hinges, though removing it often yields better results. Painting it in place saves you the time and effort of removing and rehanging a heavy door.
However, you must be more vigilant about preventing drips. To do it successfully, use a doorstop to keep the door securely open. Protect the threshold and floor with drop cloths and use painter's tape on hinges and the door frame. Be patient and allow ample drying time before closing the door to prevent the fresh paint from sticking to the frame.
How to Maintain Your Newly Painted Door
A little maintenance will keep your front door painting project looking great for years.
- Regular Cleaning: Gently wash the door monthly with a soft cloth, mild detergent, and water to remove dust and grime. Avoid abrasive cleaners.
- Inspect for Damage: Every few months, check for chips or scratches, especially around the handle.
- Touch-Ups: Keep leftover paint for quick touch-ups. Clean the damaged spot, sand it lightly if needed, and apply a small amount of paint with a fine brush.
- Address Rot: Watch for signs of wood rot on the door or frame and address them quickly. Methods to repair rot in door frames are crucial for maintaining your entryway's integrity.
- Plan for Repainting: Depending on sun exposure and weather, plan to repaint your door every 3-7 years to keep it looking fresh.
Common Mistakes to Avoid When Front Door Painting
Avoiding common pitfalls will save you time and frustration. Here are the biggest mistakes to steer clear of:
- Skipping Prep: Inadequate cleaning, sanding, or priming is the number one cause of a failed paint job. Proper prep is essential for adhesion and a smooth finish.
- Poor Sanding: Either not sanding enough (leaving a slick surface) or sanding too aggressively (leaving scratches) will show in the final coat.
- Ignoring the Weather: Painting in direct sunlight, high humidity, or extreme temperatures will negatively affect how the paint dries and looks.
- Using Interior Paint: Interior paint lacks the durability and UV protection to withstand outdoor elements and will quickly fail.
- Applying Thick Coats: One thick coat is prone to drips and chipping. Two or three thin coats create a much stronger, smoother finish.
- Closing the Door Too Soon: Ensure the paint is completely dry before closing the door, or it will stick to the frame and peel off.
- Using Cheap Tools: Low-quality brushes and rollers shed bristles and leave streaks. Invest in good tools for a professional result.
- Not Stirring Paint: Always stir your paint thoroughly to ensure consistent color and coverage.
Conclusion: Enjoy Your Stunning New Entryway
Congratulations on completing one of the most rewarding DIY home improvement projects. A freshly painted front door instantly lifts your home's curb appeal and sets a positive first impression.
By following the steps in this guide—from careful preparation to applying thin, even coats—you've achieved a beautiful, durable finish that you can be proud of. You've not only improved your home but also gained valuable skills.
Of course, life gets busy, and not everyone has the time for a DIY project. If you encounter unexpected challenges like rot damage or simply want professional results without the weekend commitment, Cover Pro Painting is here to help. Our experienced team uses the highest quality materials and proven techniques to deliver a flawless finish.
We offer expert Door Painting Services in Puyallup, WA, and serve homeowners throughout the region. If this project has inspired you to think bigger, read our insights on Maximizing Curb Appeal With Professional Painting. To bring a fresh look inside, explore our comprehensive interior painting services in Milton, WA.
Whether you did it yourself or partnered with a pro, you now have an entryway that will make you smile every time you come home.