
%201.svg)


Best Front Door Paint: How to Choose the Right Type, Sheen, and Color

Key Takeaway
Front door paint works best when you use a premium exterior acrylic latex enamel rated for doors and trim, applied in a satin or semi gloss sheen over a properly cleaned, repaired, and primed surface. Semi gloss is the safest default for durability and easy cleaning, matching the Master Painters Institute's G5 standard of 35 to 70 gloss units. How long the finish lasts depends more on prep quality than color choice.
Use a premium exterior-rated door-and-trim enamel that matches your door's material and its existing finish, in a satin or semi gloss sheen, applied over a surface that's been cleaned, repaired, and prepped properly. A semi gloss finish is the safest all-around choice for durability and easy cleaning. The front door paint colors you're drawn to matter far less to how long the job lasts than the prep underneath does.
This guide is for the homeowner repainting the entry who wants it to still look right in five years, not five months. Here's the idea the rest of this rests on: front door paint is a system. Material, condition, primer, sheen, color, and dry time all have to agree with each other. Get one wrong and the finish tells on you.
What Kind of Exterior Paint Do You Use on a Front Door?

A high-quality exterior acrylic latex enamel formulated for doors and trim is the right starting point for most exterior doors. Exterior paint is built to protect against UV fading, temperature swings, and moisture, which is exactly what an entry takes all year. It also has to survive heavy use. Think about how many times a day someone grabs that handle, sets down a delivery box, or lets the dog push through.
On the label, look for:
- Exterior-rated use (not interior or interior/exterior ambiguity)
- Door-and-trim or enamel-level performance
- Block resistance, so the door isn't sticking to the jamb or weatherstripping
- Stated compatibility with your substrate and the existing coating
Ignore anyone who tells you oil is always best or water-based is always best. The correct chemistry depends on what the door is made of and what's already on it. Most manufacturers keep their door and trim enamels in a separate collection from their wall paint, and that collection is where you should be shopping. Some premium exterior products now include self-cleaning or rain-refresh technology, and a quick dry formula can be dry to the touch in about an hour, but neither feature rescues bad prep.
Start With Your Door Material: Wood, Steel, or Fiberglass
Material and existing coating drive every other decision. Before you pick a sheen or explore color, figure out what you're painting.
One detail most guides skip: wood door manufacturers often call for finishing all six sides, front, back, top, bottom, and both vertical edges. The top and bottom are the ones people leave bare, and that's exactly where moisture moves in and out of the door. Check your door's care instructions before the first coat goes on.
Inspect the Door and Jamb First: Paint or Repair?

Give yourself five minutes with the door open and a flashlight. Look for peeling or flaking film, soft wood at the bottom rail and along the jamb, swelling or a door that keeps sticking in humid weather, rust or exposed metal, failed caulk around glass or glazing, and water staining on the interior side.
In the Pacific Northwest, moisture is one of the biggest factors we consider when evaluating an exterior door. A door might look like it only needs a fresh coat of paint, but swelling, soft wood, failed caulking, or moisture entering the end grain can signal deeper issues. That's why we examine the condition of the door and the surrounding trim before recommending a paint system.
Moisture is the quiet killer here. USDA Forest Service guidance puts the general recommended moisture content for exterior wood siding and trim at roughly 7% to 14% depending on region, and warns that painting wood above 20% moisture content makes blistering and peeling likely. Paint over damp or rotted wood and you've sealed the problem in.
The order is simple: stop the moisture source, repair the damage, let everything dry, then finally paint. If that repair involves rotted trim or a compromised jamb, it's carpentry work, and we'd rather handle it as part of the same project than hand you off to a second contractor.
What We Commonly Find When Repainting Front Doors
After working on homes throughout Western Washington, we've found that the door itself often needs attention, not just the paint. We regularly find peeling paint caused by inadequate prep, exposed or deteriorating wood at the bottom of the door, failed caulking around trim or glass, and previous paint layers that weren't properly bonded to the surface.
That's why we don't look at a front door as simply "a door that needs two coats of paint." We look at what caused the existing finish to fail and address that first.
"One of the most common issues we encounter on older homes in Western Washington is rot at the bottom of exterior doors and surrounding trim. Homeowners often call us thinking they need a simple repaint, only to discover that the paint failure is actually revealing an underlying moisture or carpentry issue." — Alex, Owner, Cover Pro Painting
Best Front Door Paint Finish: Satin, Semi Gloss, or Gloss?

A semi gloss finish is the defensible default. The Master Painters Institute's exterior repainting guide specifies G5 semi-gloss for doors, frames, and trim unless noted otherwise. It cleans easily, holds up to hands and weather, and looks right on almost any architecture. Sheen is about protection as much as appearance.
MPI's gloss ranges, measured at 60 degrees:
- Satin (G4): 20 to 35 gloss units
- Semi gloss (G5): 35 to 70 gloss units
- Gloss (G6): 70 to 85 gloss units
- High-gloss (G7): above 85 gloss units
Higher gloss generally resists physical wear and staining better. It also magnifies every sanding scratch, dent, and brush mark, so the substrate has to be genuinely smooth before the first coat goes on. A high-gloss front door looks spectacular over exceptional prep and looks rough over anything less. Satin is an excellent choice when the door has texture or minor imperfections you'd rather not advertise.
Do You Need Primer on a Front Door?
If you're wondering whether you can skip it, sometimes you can, but less often than most homeowners expect. Prime when you're dealing with:
- Bare wood, metal, or fiberglass
- Patched, filled, or repaired areas
- Rust or previously rusted metal
- Tannin bleed or water staining on wood
- A dramatic color change, light to dark or dark to light
- A glossy, chalky, or unidentifiable existing finish
A vibrant red or a deep blue going over a pale door is the classic example. A tinted primer gets you to full color in fewer finish coats and keeps the old shade from grinning through.
The exception: a sound, clean, compatible paint film in good condition can usually take finish coats directly after washing and deglossing. If you're not sure whether it's sound, it isn't.
Front Door Paint Colors: How to Choose One That Fits the House

Your door color has to answer to everything you're not changing. Roof shingles, brick or stone, siding, shutters, window frames, and gutters each carry their own undertones, and the door either complements them or fights them. Personal style matters, and the aesthetic you want works best inside those limits. The right color lifts the whole home's exterior and does more for curb appeal than almost any other small project.
A June 2026 national study of more than 2,000 recent buyers and home shoppers tested five front door colors across four exterior types, and the finding was contextual rather than absolute: visually complex exteriors tended to perform better with neutral doors, while simpler façades could carry stronger contrast. Brush a large sample board, hold it against the house, and look at it in direct daylight and again in shadow before you commit. Color shifts more between noon and dusk than most people expect.
Popular Front Door Paint Colors: The Most Popular Color Families
Navy and deep blue have led the lists for years, and the reason is practical: a rich blue sits comfortably against red brick, white trim, and gray siding alike. A softer slate blue suits cottage and craftsman homes and reads calm and peaceful from the curb. A near-black blue gives you contrast without going all the way to true black.
Hunter or forest green feels grounded against stone and brick. A true soft black is crisp and classic, and it flatters almost any trim color. Classic red, including the deeper blood-red tones, brings warmth and tradition, and a vibrant red creates the sharpest contrast of any popular color on a white house. Warm yellow is playful and welcoming, and it brings light to a shaded entry, which is why homeowners with north-facing porches often prefer it. Charcoal is the quieter cousin of black, and earthy terracotta suits stucco and warm-toned siding. If you need inspiration, start with the houses on your own street you keep noticing.
Whichever direction you lean, buy a sample of the actual front door paint you intend to use rather than judging from a printed chip.
Can a Dark Door Color Damage the Door?
It can. Dark colors absorb more solar energy, and door manufacturers warn that heat buildup on a sun-facing door can cause movement, splitting, fading, and finish failure. A storm door traps that heat and makes it worse, especially with poor ventilation. Several manufacturers set dark-color limits using light reflectance value, but the thresholds differ by company. Read your own door warranty before choosing black, navy blue, or charcoal.
Surface Prep: The Step That Decides Whether the Paint Lasts
Before any scraping or sanding, read the pre-1978 section below. Then work in this order:
- Remove hardware, or mask it carefully if removal isn't practical
- Wash the door to strip off dirt, oils, and hand grime so the new paint can bond
- Repair rot, dents, and failed joints, and let repairs cure fully
- Scrape loose and lifting paint back to a sound edge
- Sand or degloss the surface (120-grit is a reasonable starting point on sound paint)
- Vacuum and tack off every bit of dust
- Prime where the triggers above apply
- Lightly sand between coats for a smooth finish
Watch the forecast too. Temperature, humidity, rain, and direct sun all affect how the film forms, and every product label states its own application conditions. Front door paint applied in hot afternoon sun can skin over before it has a chance to level.
Should You Remove the Door or Paint It in Place?

Taking the front door off lays it flat, which prevents runs and gives you clean access to the top and bottom edges. It also means wrestling a heavy slab, leaving your entry open, and managing security and weather while the paint dries.
Painting in place keeps the house closed and is usually the practical call for a single-day repaint, but it demands careful masking around weatherstripping, hinges, and glass. The middle path works well: paint in place, but swing the door fully open and address the edges deliberately rather than as an afterthought.
Brush, Roller, or Sprayer for a Smooth Finish?
Match the tool to the surface. Use a quality brush for panel profiles, recessed detail, and edges. Use a 1/4-inch nap roller or a foam roller for flat stiles, rails, and slab doors. A sprayer gives the smoothest finish when the masking is thorough and the hand running it knows what it's doing.
Work in a logical order: panels first, then rails, then stiles, then edges, keeping a wet edge as you go. Two to three thin coats beat one heavy coat every time. Thin coats level better, dry more predictably, and create far less risk of the door sticking to the jamb.
Drying, Curing, and When It's Safe to Close the Door

There are four stages, and they're not the same thing. Dry to touch comes first, sometimes within an hour. Recoat time is when the next coat can go on. Safe handling is when hardware can be reinstalled, commonly a day or more per the label. Full cure is when the film reaches its final hardness, which takes considerably longer. Every one of those numbers comes from the product label and the day's conditions, not from a universal rule.
Why a "Dry" Front Door Still Sticks to the Jamb
This is called blocking. ASTM's blocking-resistance standard explains that dry paint on doors and windows can still stick to another painted surface depending on coating hardness, pressure, temperature, humidity, and how long the two surfaces stay in contact. Keep fresh paint off weatherstripping where you can, avoid latching the door tight overnight too early, and choose a block-resistant door paint from the start.
Painting a Front Door in a Pre-1978 Home
EPA estimates that about three-quarters of U.S. homes built before 1978 still contain some lead-based paint. Doors are high-friction surfaces, which means they generate chips and dust in the one space everybody in the house passes through daily. Don't dry-sand or aggressively scrape an older front door until lead risk has been considered.
Paid contractors disturbing paint in covered pre-1978 housing and child-occupied facilities generally must be certified and follow lead-safe work practices. The federal RRP program does define minor-repair thresholds of 6 square feet per room indoors and 20 square feet outdoors, but those exclusions carry conditions and prohibited practices, so they shouldn't be treated as a workaround. Cover Pro Painting is EPA Lead-Safe (RRP) Certified.
When to Call a Professional
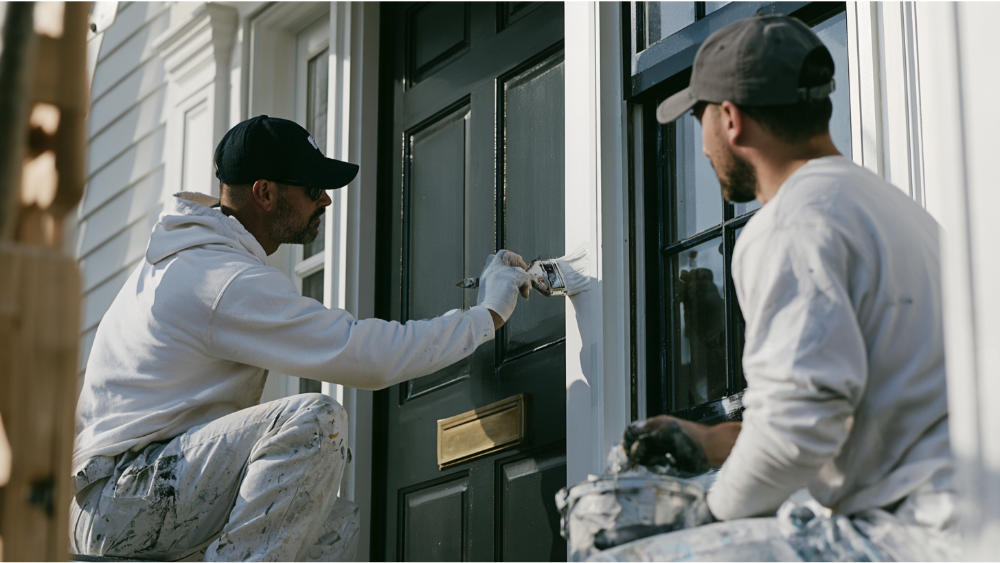
Bring in help when you find rot or a damaged jamb, extensive peeling or failed adhesion, rust or bare metal, a swollen door that sticks, or an existing finish you can't identify (especially a clear coat). Same goes for a pre-1978 front door, a high-gloss result you actually want to look high-gloss, or an entry that has to stay secure and usable the whole time.
If the door is sound and the old finish is in good shape, this is a very reasonable weekend project. We'd rather tell you that than sell you something you don't need.
Front Door Painting Done Right, Start to Finish
We treat surface prep as non-negotiable, because no front door paint outlasts the surface underneath it. We use premium paint products backed by lifetime manufacturer warranties, and we carry a five-year warranty on exterior painting projects. If the door, jamb, or surrounding trim needs rot repair or carpentry, our team handles it, so there's no second contractor to coordinate.
You'll get clear communication and a transparent estimate that walks you through the process before anything starts, plus a free color consultation to narrow down your front door colors with confidence. We're licensed, bonded, and insured in Washington State and EPA Lead-Safe Certified. Alex, our founder, personally oversees each project, backed by over 13 years in business and more than 100 years of combined experience on the team.
A front door is one of the first things people notice about your home, but it also takes a surprising amount of abuse from weather and everyday use. We don't believe in simply covering up the problem with another coat of paint. We want to know why the existing finish failed, fix what needs to be fixed, and apply a finish you're going to be happy with for years.
That's the approach we take on every project at Cover Pro Painting—from the first conversation through the final walkthrough.
Start with a free estimate and see exactly what your project will involve. Call us at 206-222-0435.
Frequently Asked Questions
What kind of paint do you use on a front door?
An exterior paint rated for doors and trim and compatible with your door material and the existing coating. High-quality exterior acrylic latex performs well for durability and UV resistance on most doors. Choose satin or semi gloss.
Which paint finish is best for a front door?
Semi gloss is the safest default, matching MPI's G5 range of 35 to 70 gloss units at 60 degrees. Satin gives a softer, more forgiving look on imperfect surfaces. Gloss and high-gloss only work over exceptional prep.
What are three front door colors to think twice about?
There's no universal banned list, but three deserve hard thought: any color that clashes with fixed elements like roof and brick, a very dark color on a sun-exposed or storm-doored entry because of heat and warranty risk, and a trend-driven color that fights the rest of the house's palette.
What is the most popular front door paint color?
Navy and deep blue top most national lists, with soft black and forest green close behind. Popular doesn't automatically mean right for your house, though. Fixed materials and sun exposure should settle the question before trend does.
Can I just paint over my front door?
Yes, if the existing finish is sound, clean, compatible, and deglossed first. No, if it's peeling, rusting, swollen, rotted, or an unknown clear coat. In those cases the new paint fails right along with the old layer underneath it.
